Federation
SecTrail MFA provides centralized authentication for your enterprise applications with SAML 2.0 based Single Sign-On (SSO) and federation support.
Federation Management
SecTrail MFA federation management consists of three main components:
Identity Provider Configuration: Configuring SecTrail MFA as a SAML IdP
Service Provider Management: Integrating third-party applications
SSO Sessions: Active session management and monitoring
Identity Provider Configuration
This page allows you to configure your SAML 2.0 Identity Provider settings. The IdP authenticates users and provides identity assertions to Service Providers (SPs).
Core Configuration Elements
Entity ID:
- Unique identifier for your IdP
- Typically a URL or domain name
- Example:
https://mfa.company.com/saml/metadata - Must be unique for each IdP
ACS URL:
- The endpoint where SPs send authentication responses
- Format:
https://your-domain.com/saml/acs - Where the SAML assertions are delivered
SLO URL:
- The endpoint for Single Logout functionality
- Format:
https://your-domain.com/saml/slo - Supports global sign-out
Binding Methods
- Transport mechanisms for SAML messages
- HTTP-POST: Sending SAML message via Form POST
- HTTP-Redirect: Sending SAML message via URL redirect
- Both are supported
Certificates:
- Used to sign and encrypt SAML messages
- SSL certificate in X.509 format
- Public/Private key pair
- Configured via Generate or Import options
Security Settings
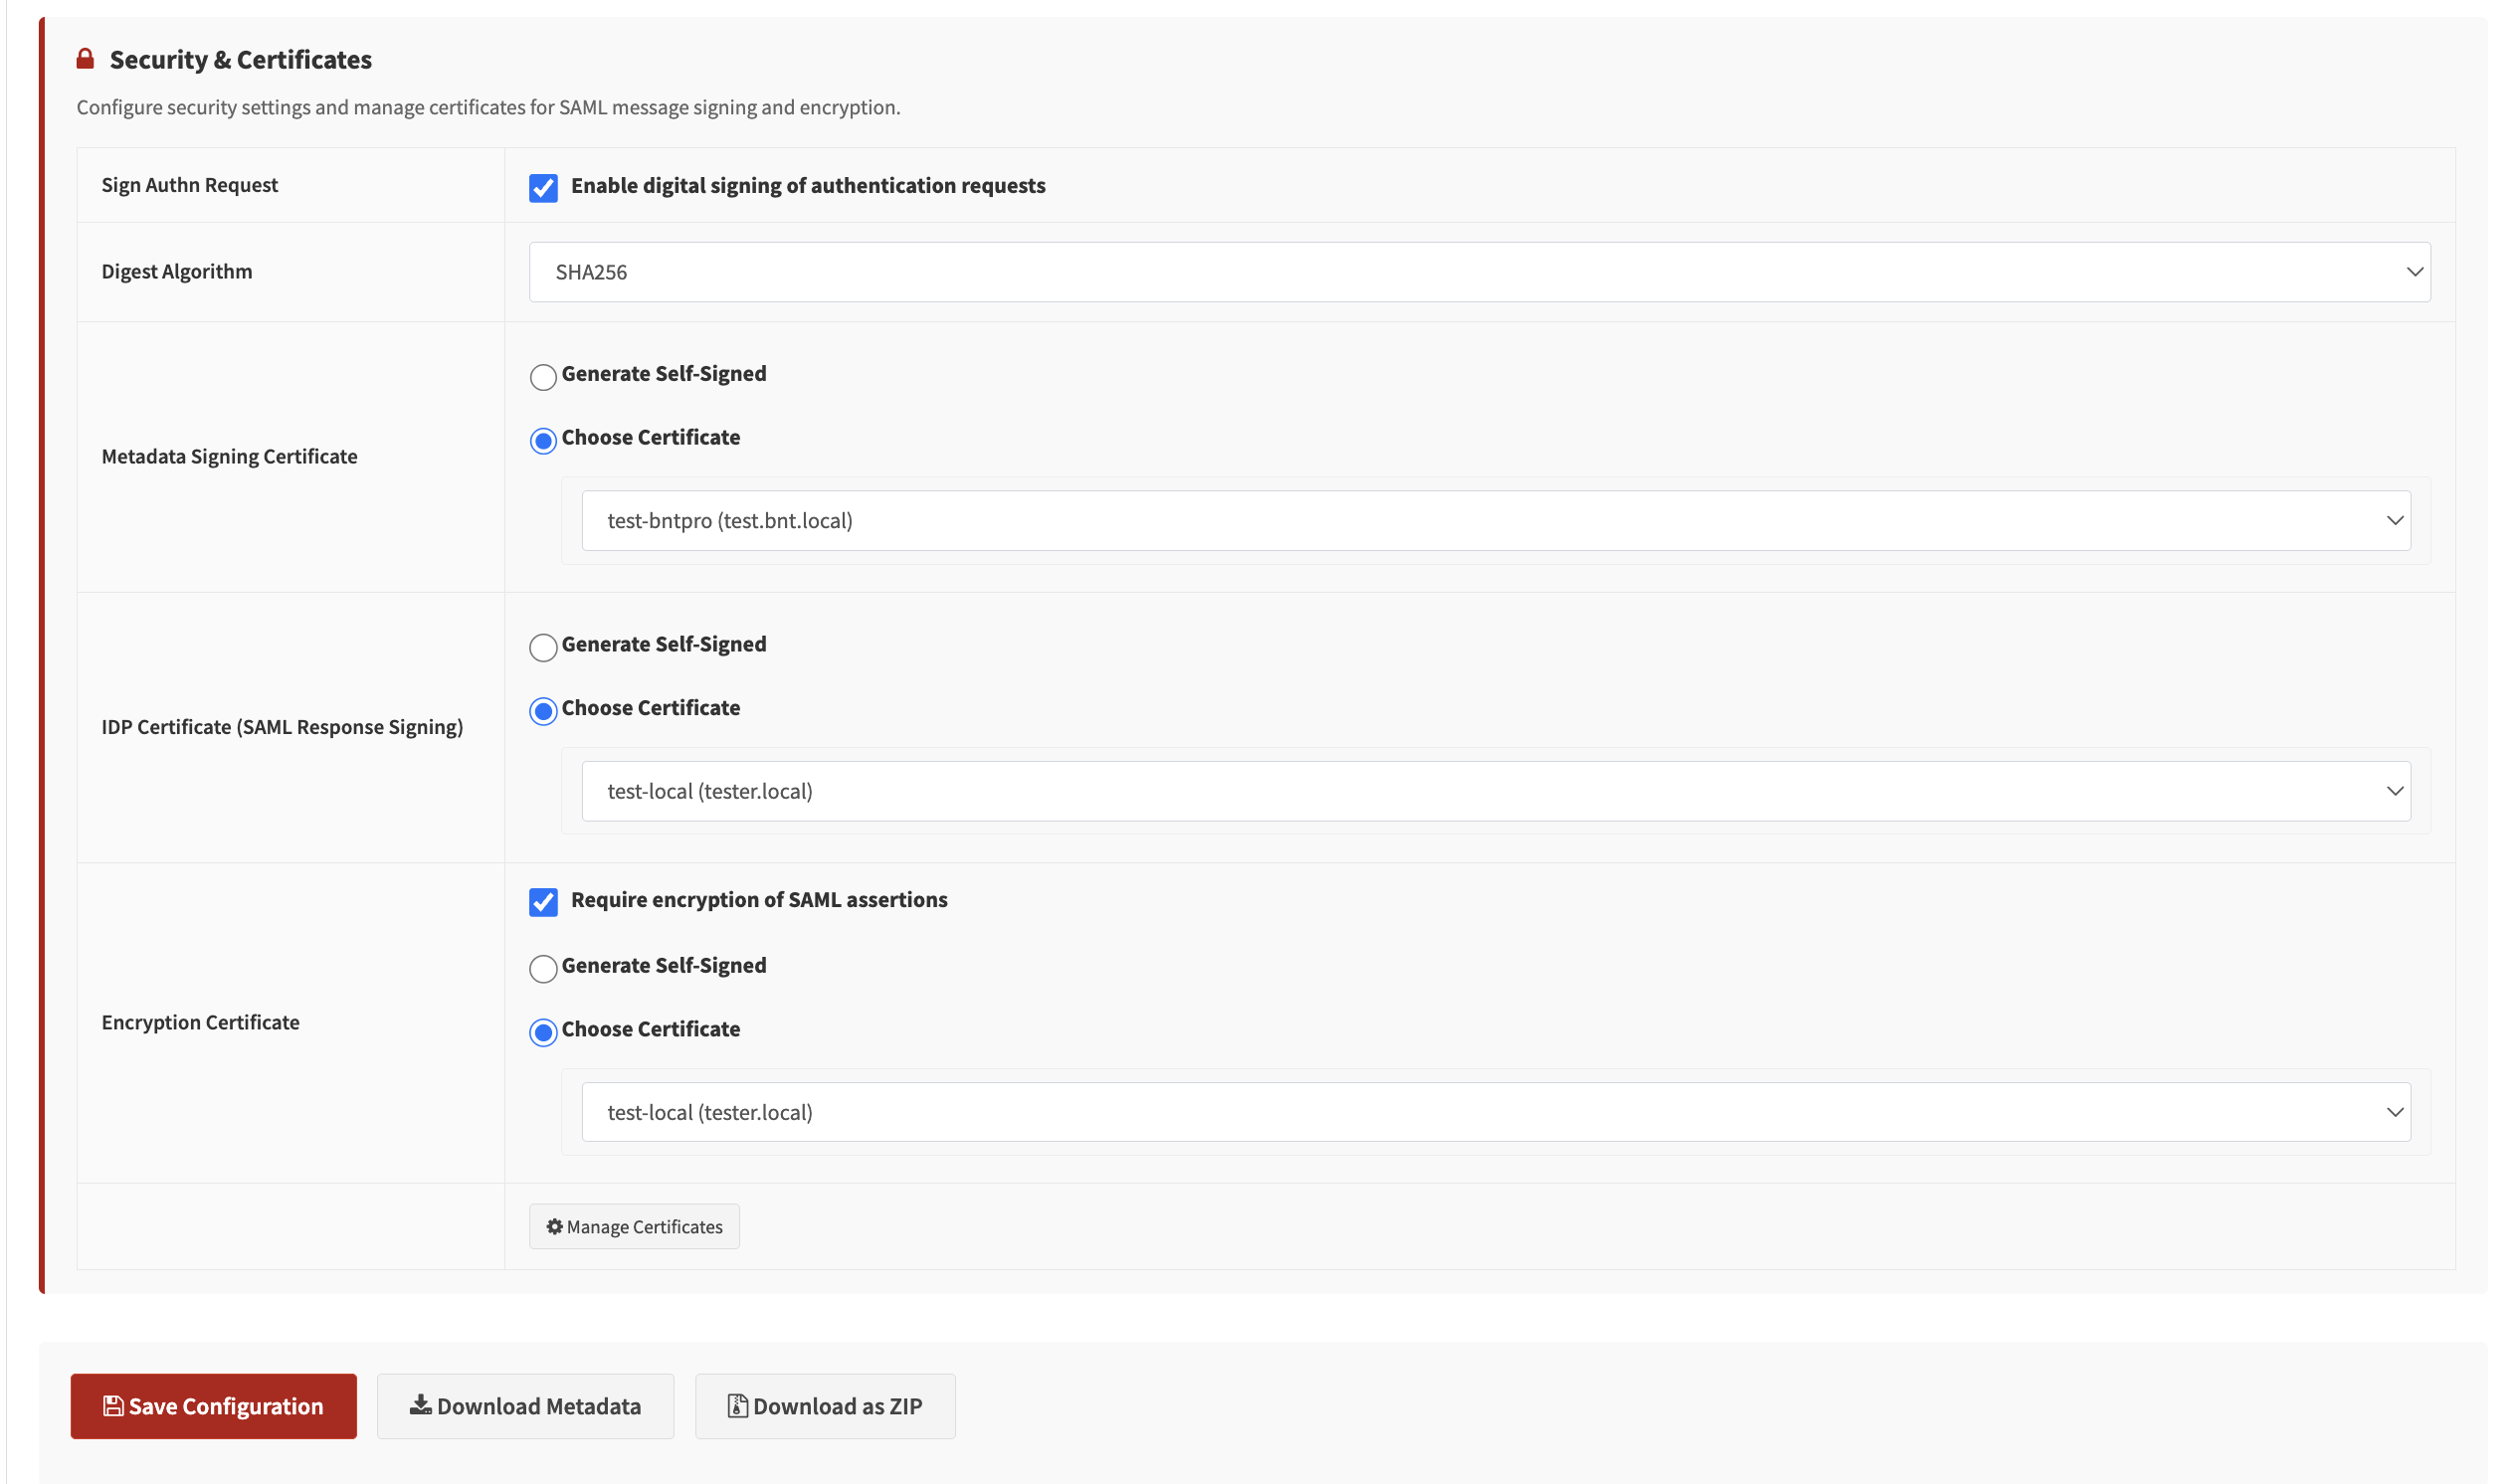
Sign AuthN Request:
- Digitally sign outgoing authentication requests
- Recommended for security
- SP can verify the IdP's identity
Digest Algorithm:
- Hash algorithm for signing
- SHA-256+ is recommended (secure)
- SHA-1 is old and insecure (do not use)
- SHA-512 for maximum security
Encrypt Assertions:
- Encrypt the content of the SAML assertion
- Recommended for sensitive information
- Encrypted with the SP's public key
Certificate Management
Federation security relies on digital certificates to ensure secure communication between the Service Provider (SP) and the Identity Provider (IdP). This panel allows you to manage the three core certificates that SecTrail MFA uses as an IdP. For each certificate, you can perform the following actions:
- Generate: The system creates a secure certificate and private key pair for you. This is the quickest and easiest method.
- Import: If you have your own organizational certificate or one signed by a specific Certificate Authority (CA), you can upload it to the system using this option.
- Download: Allows you to download the public key of the current certificate (in .cer format). You will need to provide this file to the Service Provider (SP) for their configuration.
Certificate Types and Their Purposes
1. Metadata Signing Certificate This is the certificate SecTrail MFA uses to sign its own IdP metadata. When SPs import this metadata, they use this signature to verify the integrity of the metadata and confirm that its origin is SecTrail MFA.
2. IDP Certificate (SAML Response Signing) This is the certificate SecTrail MFA uses to sign SAML responses and assertions sent to Service Providers (SPs). The SP uses the public key of this certificate to verify that the responses came from SecTrail MFA and have not been altered.
3. Encryption Certificate This is the certificate whose public key is used by Service Providers (SPs) to encrypt sensitive information, such as SAML assertions, before sending it to SecTrail MFA. You should create this certificate using the Generate button and then Download it to upload to your SP's configuration. SecTrail MFA uses its private key to decrypt the incoming encrypted data.
Configuration Steps

IdP Configuration - Entity ID, ACS/SLO URL, binding methods
Certificate Settings - Generate or import, download the generated certificate
Configure Certificate
- Generate: Click "Generate Certificate", enter the validity period, the system creates the certificate
- Import: Upload an existing certificate and private key files
- Download the generated certificate using "Download Certificate" and share it with SPs
Configure Identifiers
- Set the Entity ID
- Define the ACS URL
- Configure the SLO URL
- Use HTTPS for all URLs
Select Bindings
- Choose HTTP-POST and/or HTTP-Redirect for ACS
- Choose HTTP-POST and/or HTTP-Redirect for SLO
- Use the bindings supported by the SP
Set Security Options
- Enable AuthN request signing
- Select SHA-256 or SHA-512 for the digest algorithm
- Enable assertion encryption if required
Save Configuration
- Click the "Save Configuration" button
- Changes are applied
Download Metadata
- Click the "Download Metadata" button
- Download the IdP metadata XML file
- Share this file with the Service Providers
IdP Metadata
IdP metadata is an XML file containing all IdP configuration information.
Metadata Content:
- Entity ID
- SSO and SLO endpoint URLs
- Supported bindings
- X.509 public certificate
- Supported Name ID formats
- Signing and encryption settings
Metadata Usage:
- Send to SP administrators
- SPs import this metadata to establish the IdP connection
- Send new metadata when certificates change
Best Practices
✅ Use HTTPS: Use HTTPS for all URLs (Entity ID, ACS, SLO)
✅ Sign AuthN Request: Enable authentication request signing for enhanced security
✅ Strong Algorithm: Use SHA-256 or SHA-512 for the digest algorithm (do not use SHA-1)
✅ Long Validity: Create certificates with sufficient validity periods (e.g., 10 years)
✅ Secure Backup: Securely back up your certificates and private keys
✅ Share Metadata: Share the IdP metadata with Service Providers for proper integration
After creating a new certificate, all existing Service Provider configurations will be removed. You will need to reconfigure SP connections with the new certificate.
Before changing the certificate:
- Notify all SPs
- Plan a maintenance window
- Ensure SPs import the new metadata
- Create a transition plan from the old certificate to the new one
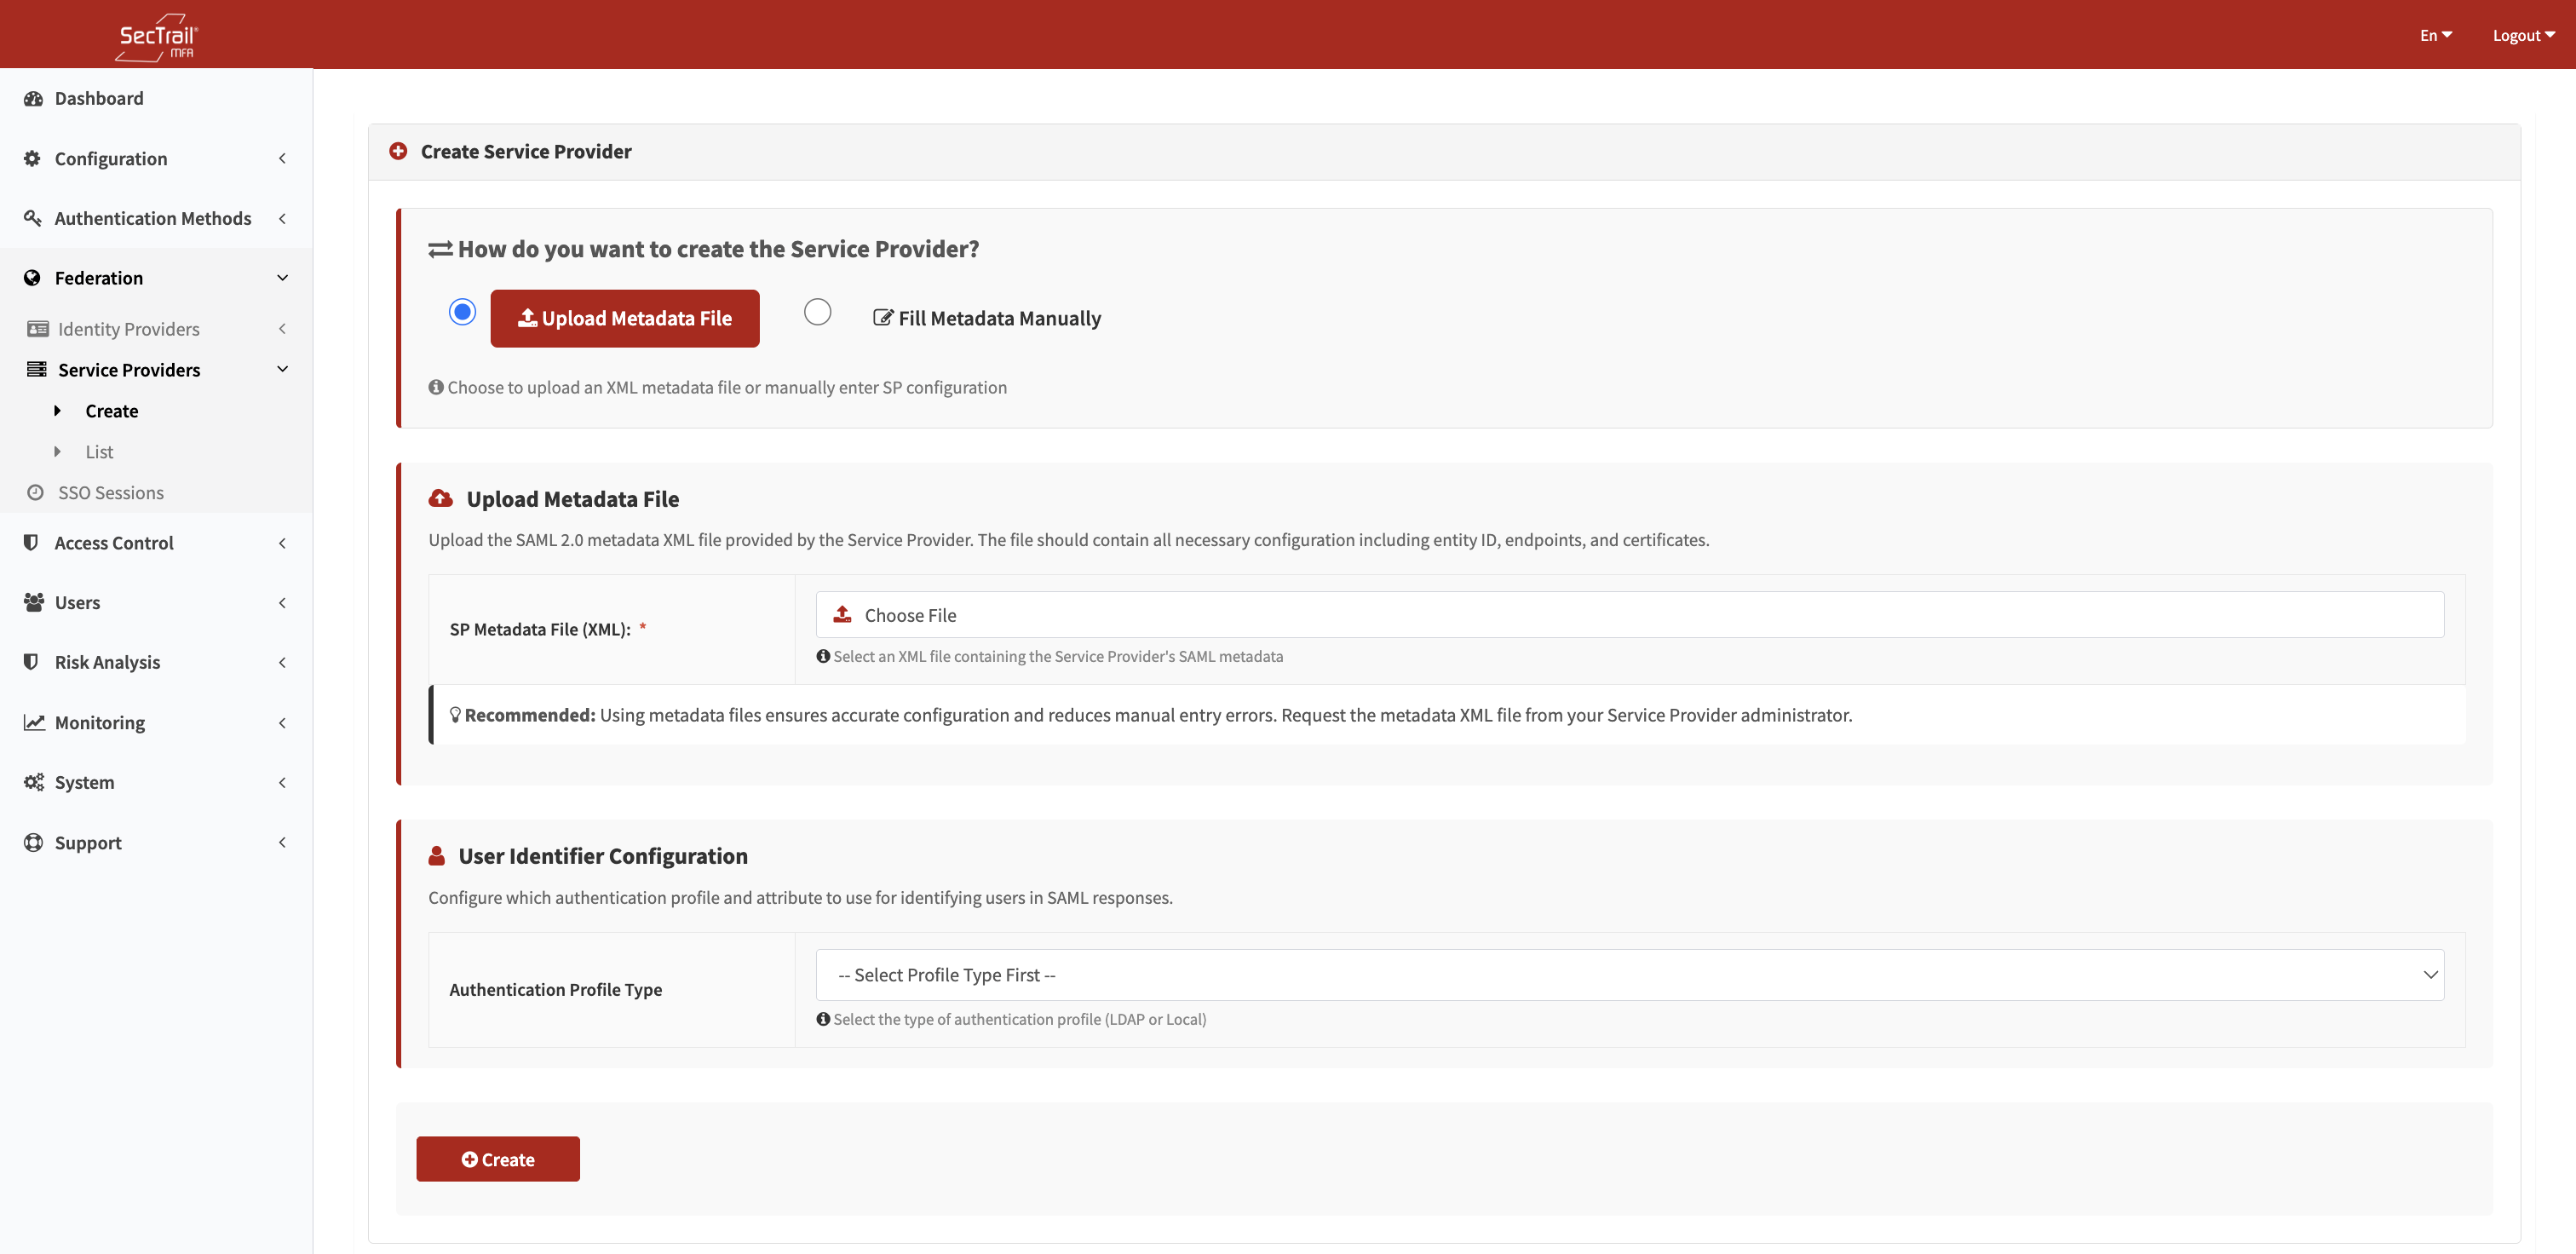
Service Provider Management
Add a new Service Provider (SP) to enable SAML-based single sign-on. You can upload a metadata XML file or manually configure the SP settings.
Configuration Methods
Upload Metadata (Recommended):
- Upload an XML file containing the entire SP configuration
- This is the easiest and most accurate method
- Use the SP's metadata URL or XML file
- All settings are imported automatically
Manual Entry:
- Use if the metadata file is not available
- Manually enter the SP configuration details
- Fill in each field carefully
- Higher risk of error
Required Information
SP Manual Entry - Entity ID, ACS URL, certificate, and binding configuration
Entity ID (Mandatory):
- Unique identifier for the SP
- Example:
https://app.company.com/saml/metadata - Provided by the SP
ACS URL (Mandatory):
- The location where SAML responses will be sent
- Assertion Consumer Service endpoint
- Example:
https://app.company.com/saml/acs
Signing Certificate (Optional):
- The SP's public certificate for verification
- Used to verify messages coming from the SP
- In PEM format (including BEGIN/END lines)
Bindings:
- Transport mechanisms
- HTTP-POST or HTTP-Redirect
- Select the bindings supported by the SP
Name ID Format (Optional):
- User identifier format
email,persistent,transient,unspecified- The format expected by the SP
Setup Steps
Select Method
- Choose "Upload Metadata" or "Manual Entry"
- If metadata is available, always use metadata
Provide Configuration
- With Metadata: Upload the XML file or enter the URL
- With Manual Entry: Fill in Entity ID, ACS URL, and other fields
Configure Security
- Enable assertion encryption (recommended)
- Enable signature validation
- Upload the SP certificate (required for signature validation)
Create SP
- Click the "Create" button
- The Service Provider is added
- It appears in the SP list
Share IdP Metadata
- Download your IdP metadata
- Send it to the SP administrator
- The SP imports the IdP metadata into their system
Test
- Attempt to log in to the SP application
- Test the SSO flow
- Check logs if there are errors
Security Options
Encrypt Assertion:
- Encrypts SAML assertions for privacy
- Encrypted with the SP's public key
- Recommended for sensitive information
- Secure while traversing the network
Validate Signatures
- Verifies the authenticity of messages coming from the SP
- Requires the message to be signed with the SP's private key
- The SP certificate must be uploaded
- Protection against Man-in-the-middle attacks
Certificate Formats:
- PEM Format: Including BEGIN/END lines
- X.509: Standard SSL certificate format
SP Metadata Fields
Mandatory Fields:
- SP Entity ID: Service Provider identifier
- ACS URL: URL where the SAML assertion will be sent
Optional Fields:
- SLO URL: Logout URL
- Certificate: SP's public key certificate (for assertion encryption)
- Binding: HTTP-POST or HTTP-Redirect
- Name ID Format: User identifier format
- Organization Info: SP organization information
- Contact Info: Technical and support contact information
Ensure that certificates are valid and match the SP configuration. Invalid certificates will cause authentication errors.
Import the SP metadata whenever possible. Using metadata instead of manual configuration reduces the risk of error and ensures all settings are correct.
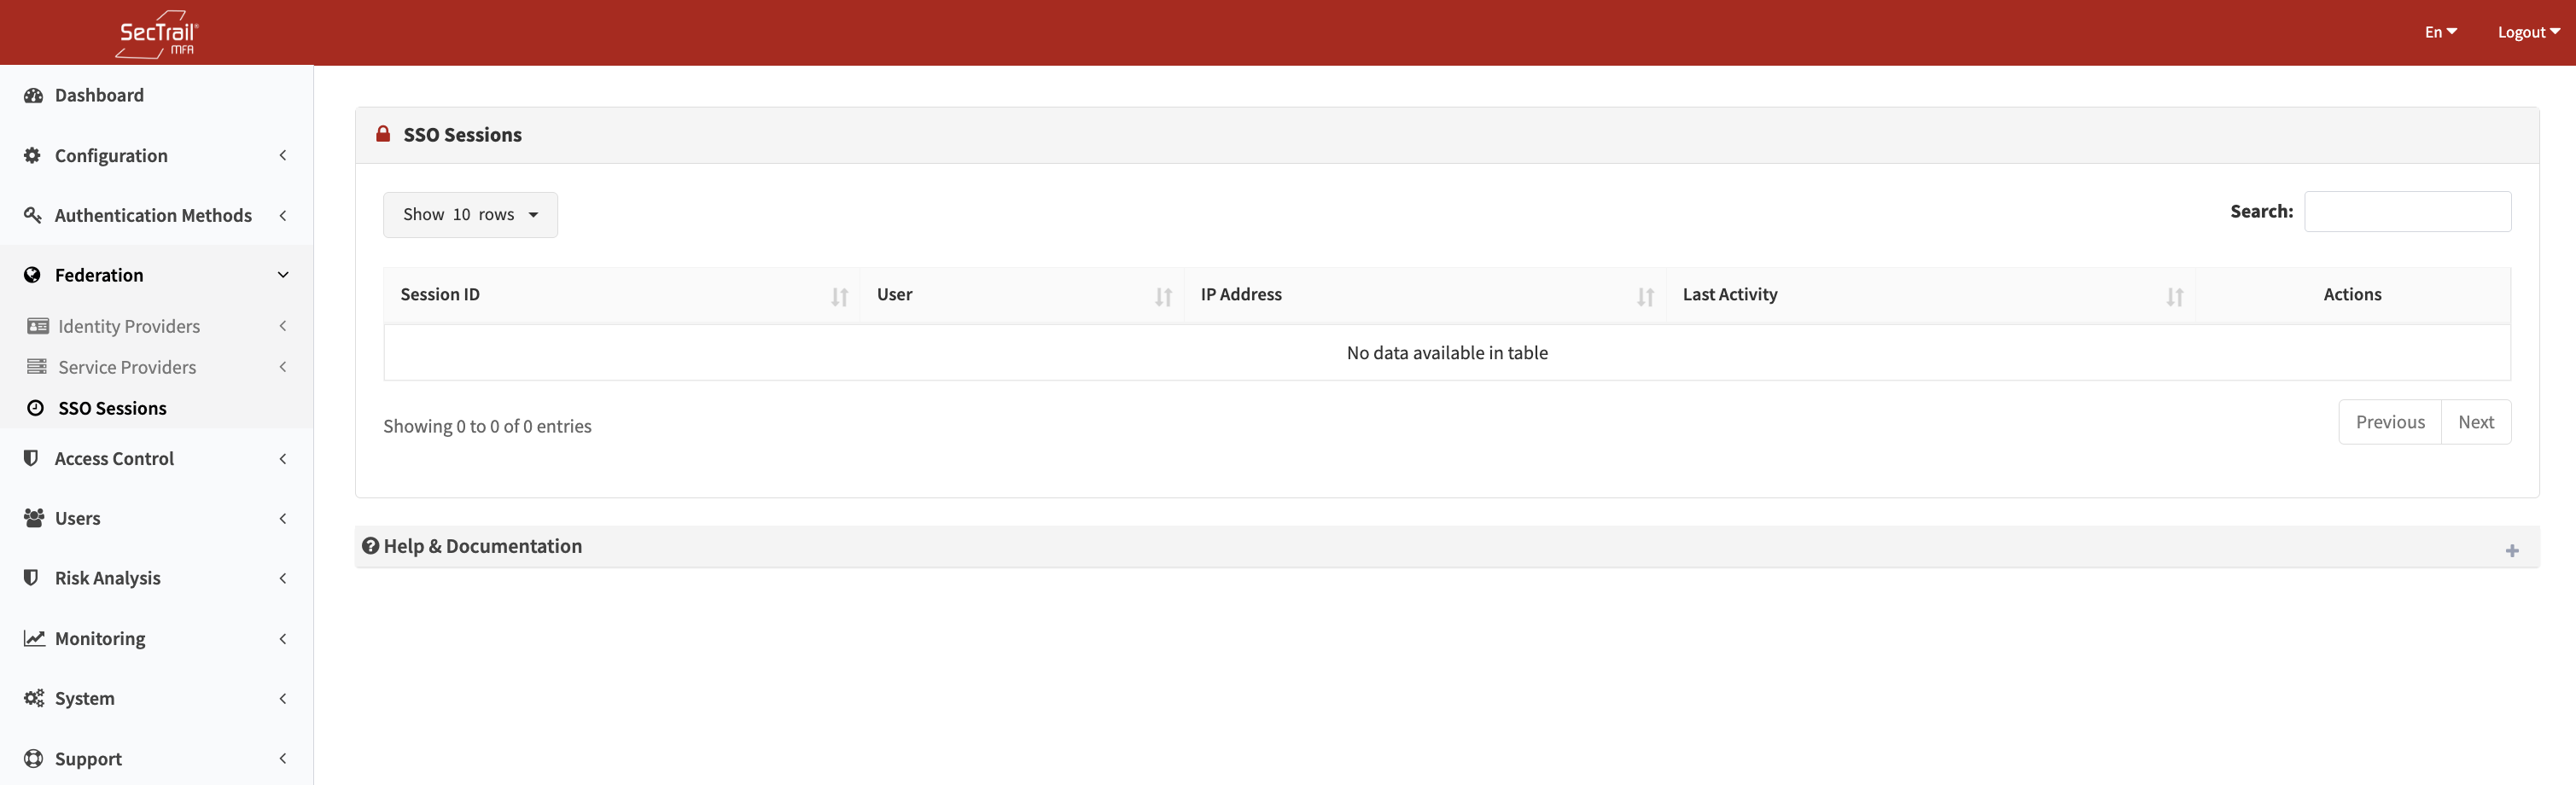
SSO Sessions
This page displays active Single Sign-On (SSO) sessions. A session is created when a user logs in from a browser.
How SSO Works
Session Creation:
- A user logs into an application (e.g., F5) from a browser
- SecTrail MFA authenticates the user (MFA challenge)
- An SSO session is created after successful verification
- A secure cookie is stored in the browser
Single Sign-On:
- No re-verification is required when accessing another application (e.g., Ivanti) using the same session
- SecTrail MFA uses the existing SSO session
- The user gains direct access to the application
Browser-Based Sessions:
- Each browser creates its own session
- Separate login is required for different browsers
- Cookies are specific to the browser
SSO Session Example
Active SSO Sessions - Session ID, user, IP, activity, and applications used
Scenario:
- User logs into F5 VPN from the Chrome browser
- Authenticates with LDAP + Soft OTP
- SSO session is created for Chrome
- Then accesses the Ivanti application from the same Chrome session
- ✅ No re-verification is required, automatic login occurs
Different Browser:
- The same user attempts to access Ivanti from the Firefox browser
- ❌ No SSO session in Firefox
- The user must log in and verify again
Session Information
The following information is displayed in the SecTrail MFA session list:
Session ID:
- Unique identifier for the browser session
- Unique ID for each session
- Used for session tracking
User:
- Verified username
- The user who started the session
- LDAP or local user
IP Address:
- IP address of the session
- The IP from which the user connected
- Important for security monitoring
Last Activity:
- Time of the last activity
- Time of the most recent SSO usage
- Used for detecting idle sessions
Session Termination
Administrators can delete sessions to force users to re-authenticate.
When to Use:
- When a user account is compromised
- When immediate access revocation is necessary
- When a user's device is lost or stolen
- When suspicious activity is detected
- During user offboarding
Deleting a Session:
- Find the relevant session in the session list
- Click the "Delete" button
- Confirm
- The session is terminated immediately
Result:
- The user is forced to log out only from that browser
- Sessions in other browsers are not affected
- The user must log in and verify again
Deleting a session only forces the user to log out from that specific browser. The user's active sessions in other browsers remain active.
Bulk Session Management
Terminating All User Sessions:
- Filter by user
- Select all the user's sessions
- Perform bulk deletion
- Logs the user out of all browsers
Expired Sessions:
- Sessions inactive for a specific period are terminated automatically
- Default: 8 hours idle timeout
- Configurable duration
- Recommended for security
SP-Initiated Flow
User Accesses SP
- User attempts to log in to an application (e.g., Office 365)
- SP detects that the user is unverified
SP Creates SAML Request
- SP creates a SAML AuthnRequest
- The request is sent to the SecTrail MFA IdP (Redirect or POST)
IdP Authentication
- SecTrail MFA verifies the user with MFA
- LDAP + Soft OTP or another combination
- If an SSO session exists, it proceeds directly to step 4
SAML Assertion Creation
- SecTrail MFA creates a signed SAML assertion
- Assertion includes user information and attributes
- Signed with the private key
Sending to SP
- The assertion is sent to the SP's ACS URL
- Via HTTP-POST binding
Sign-In
- SP validates the assertion (signature check)
- Retrieves user information
- Opens the application session
IdP-Initiated Flow
User Logs into IdP
- User logs into the SecTrail MFA web panel
- Authenticates with MFA
Application Selection
- User selects the application they want to access with SSO
- Selection from the list of available SPs
SAML Assertion Creation
- SecTrail MFA creates the assertion
- User information and attributes are added
Redirection to SP
- The user is redirected to the SP with the assertion
- Assertion is POSTed or sent as a URL parameter
Automatic Login
- SP validates the assertion
- The user is automatically logged into the application
- No MFA challenge is required
Single Logout (SLO)
SLO Configuration
Global Logout:
- All SSO sessions are terminated when logging out of one application
- Coordinated sign-out between IdP and SPs
- SLO request and response cycle
- Automatic sign-out from all applications
SLO Flows
SP-Initiated SLO:
- User logs out from the SP (e.g., logout from Office 365)
- SP sends an SLO request to the IdP
- IdP sends SLO requests to all active SP sessions
- Each SP terminates the session and returns a response
- IdP terminates its own session
- User is redirected to the sign-out confirmation page
IdP-Initiated SLO:
- User logs out from the IdP (logout from SecTrail MFA)
- IdP sends SLO requests to all active SPs
- SPs terminate sessions
- SPs return an SLO response
- IdP terminates the session
- User is redirected to the sign-out page
SLO Best Practices
✅ SLO URL Configuration: Configure the SLO URL on both the IdP and SP
✅ Binding Selection: Use HTTP-Redirect for SLO (lighter weight)
✅ Timeout Settings: Configure a timeout for the SLO request
✅ Backup Plan: Some SPs may not support SLO; manual logout may be required
Security and Best Practices
SAML Assertion Security
✅ Assertion Signing: All assertions should be digitally signed
✅ Assertion Encryption: Use encryption for sensitive information
✅ Certificate Management: Renew certificates regularly (10-year validity)
✅ Replay Attack Protection: Check assertion ID and timestamp
✅ Audience Restriction: Ensure the assertion is intended for the correct SP
Metadata Management
✅ Metadata Update: Update metadata immediately when certificates change
✅ Metadata Backup: Securely back up IdP and SP metadata
✅ Metadata Validation: Carefully verify imported metadata
✅ Metadata URL: Use a metadata URL if possible (for automatic updates)