NGINX
SecTrail CM establishes agent-less connections to NGINX web servers to enable automatic deployment and renewal of SSL certificates.
Connection Requirements
| Requirement | Detail | Description |
|---|---|---|
| Protocol | SSH (Secure Shell) | Secure remote connection protocol |
| Port | 22 | Standard SSH port or custom port |
| Authentication | SSH Key or Password | Authentication with SSH key or password |
| User Permission | Configuration read/write permission | Access and edit permission for NGINX config files |
Automatic Operations
SecTrail CM automatically performs the following operations on NGINX:
- Certificate and Key Upload: Secure transfer of SSL certificate, private key, and chain file
- Configuration Update: Updating NGINX Server Block SSL directives
- Configuration Test: Syntax check and validation
- Service Reload: Seamless reloading of NGINX service
Configuration Steps
1. Create NGINX Linux User
Navigate to Automation > Device Users and create a user for NGINX.
2. Add NGINX Device to SecTrail CM
Click Automation > Devices > Add New Device button and enter the following information:
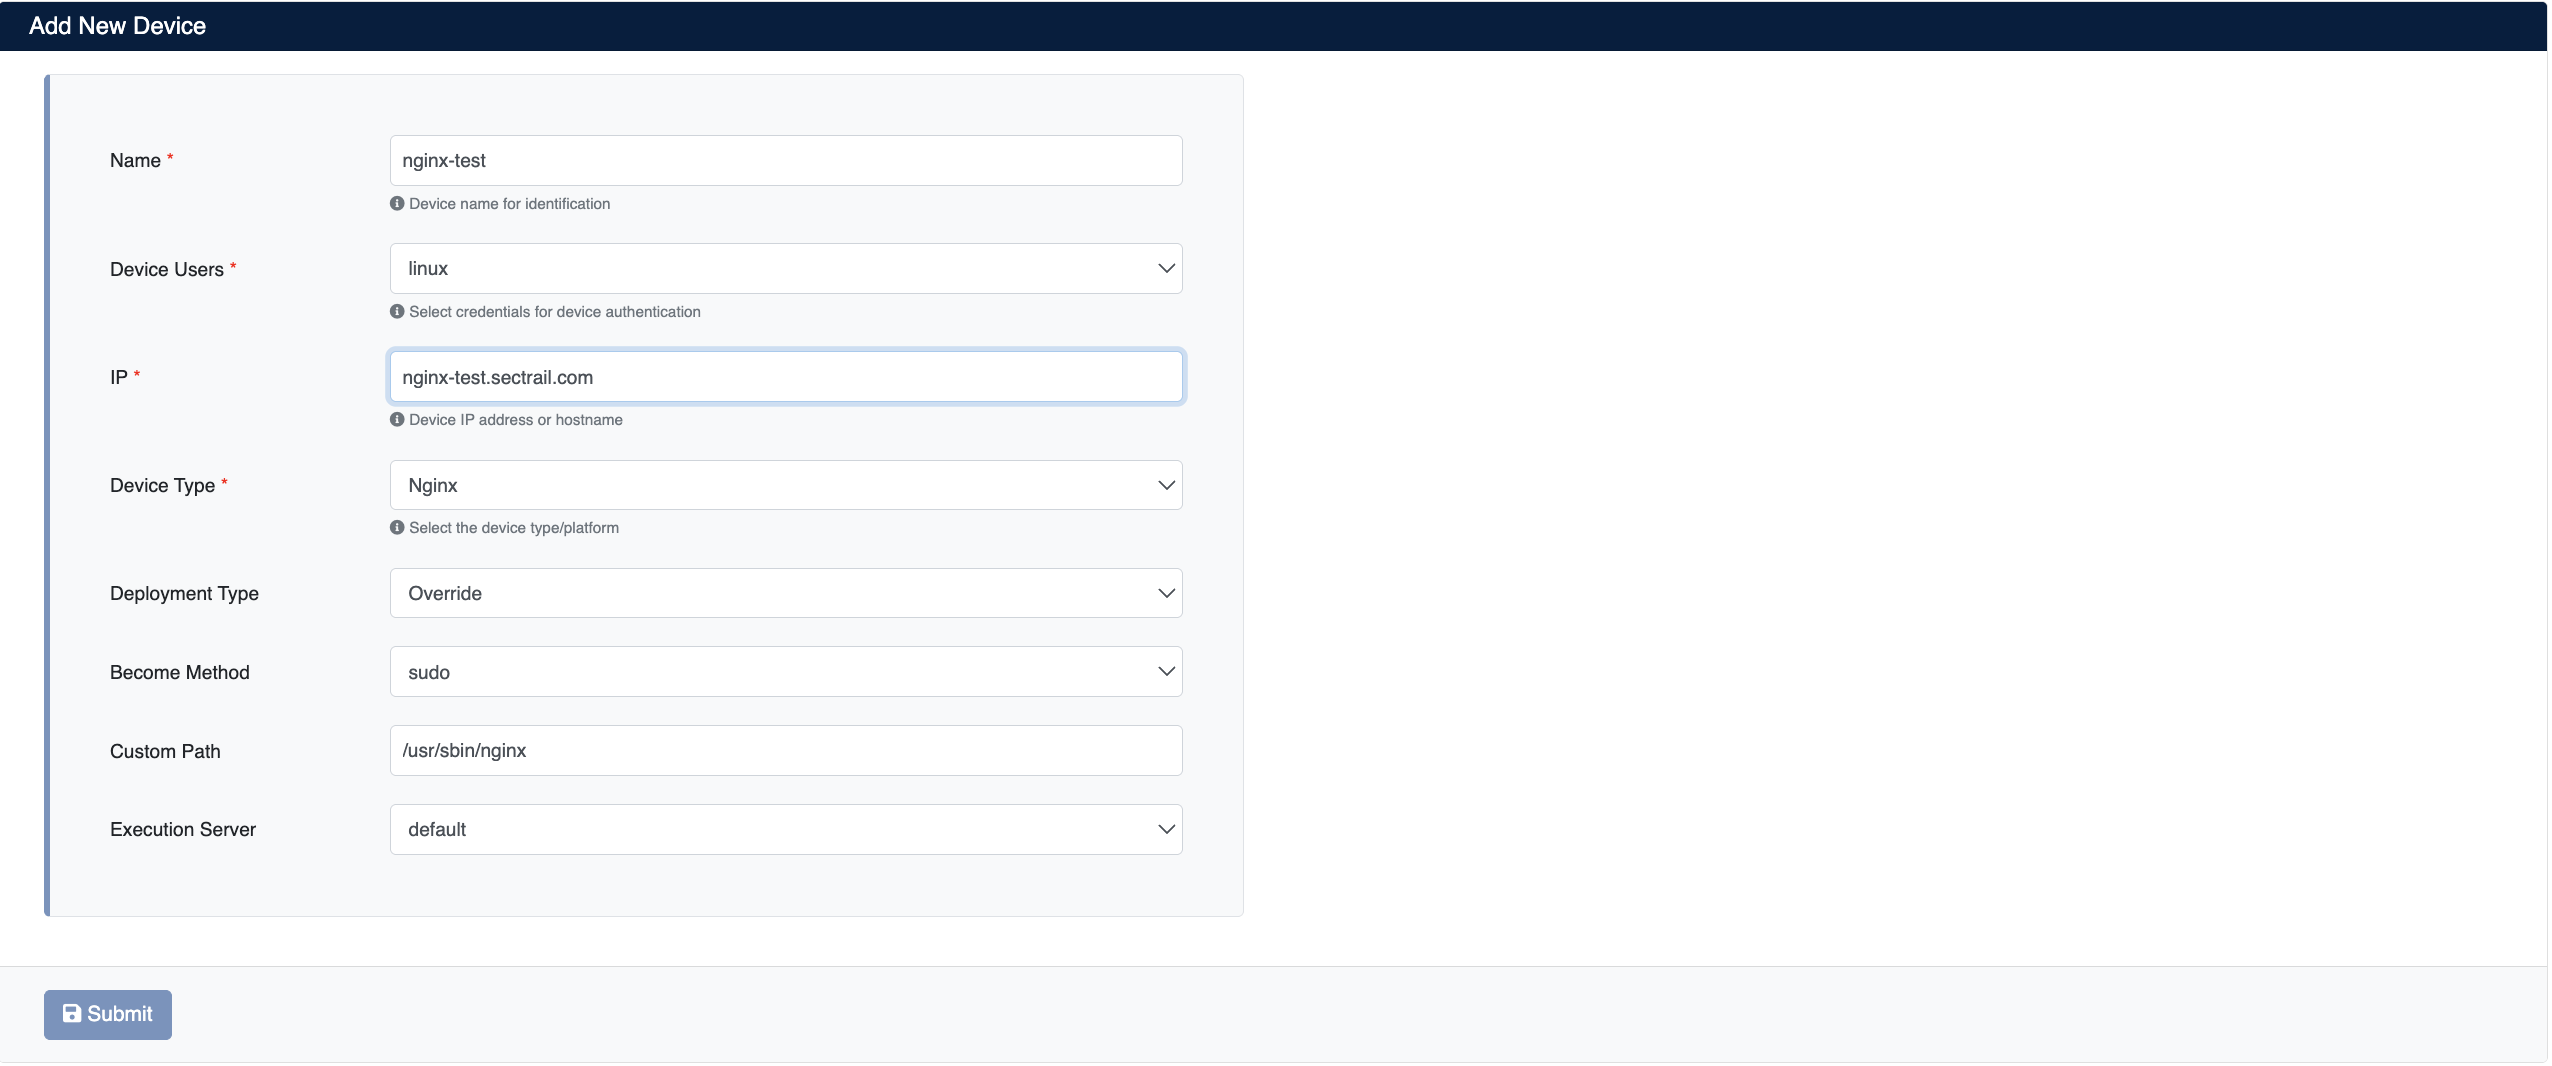
- Name: Give a descriptive name for the device
- Device Users: Select the user you created in Step 1
- IP: Enter the IP address of the NGINX server
- Device Type: Select
Nginxfrom the dropdown menu - Become Method: Select privilege escalation method (e.g.,
sudo) - Custom Path: Enter the path to the NGINX binary file (e.g.,
/usr/sbin/nginx)
After the NGINX device is added to SecTrail CM, IP addresses and ports of all Server Blocks defined on the device are automatically included in the discovery period and regularly scanned.
3. View Device Information
After adding a device, it will be displayed in the Automation > Devices list. Click on the row to view device details:
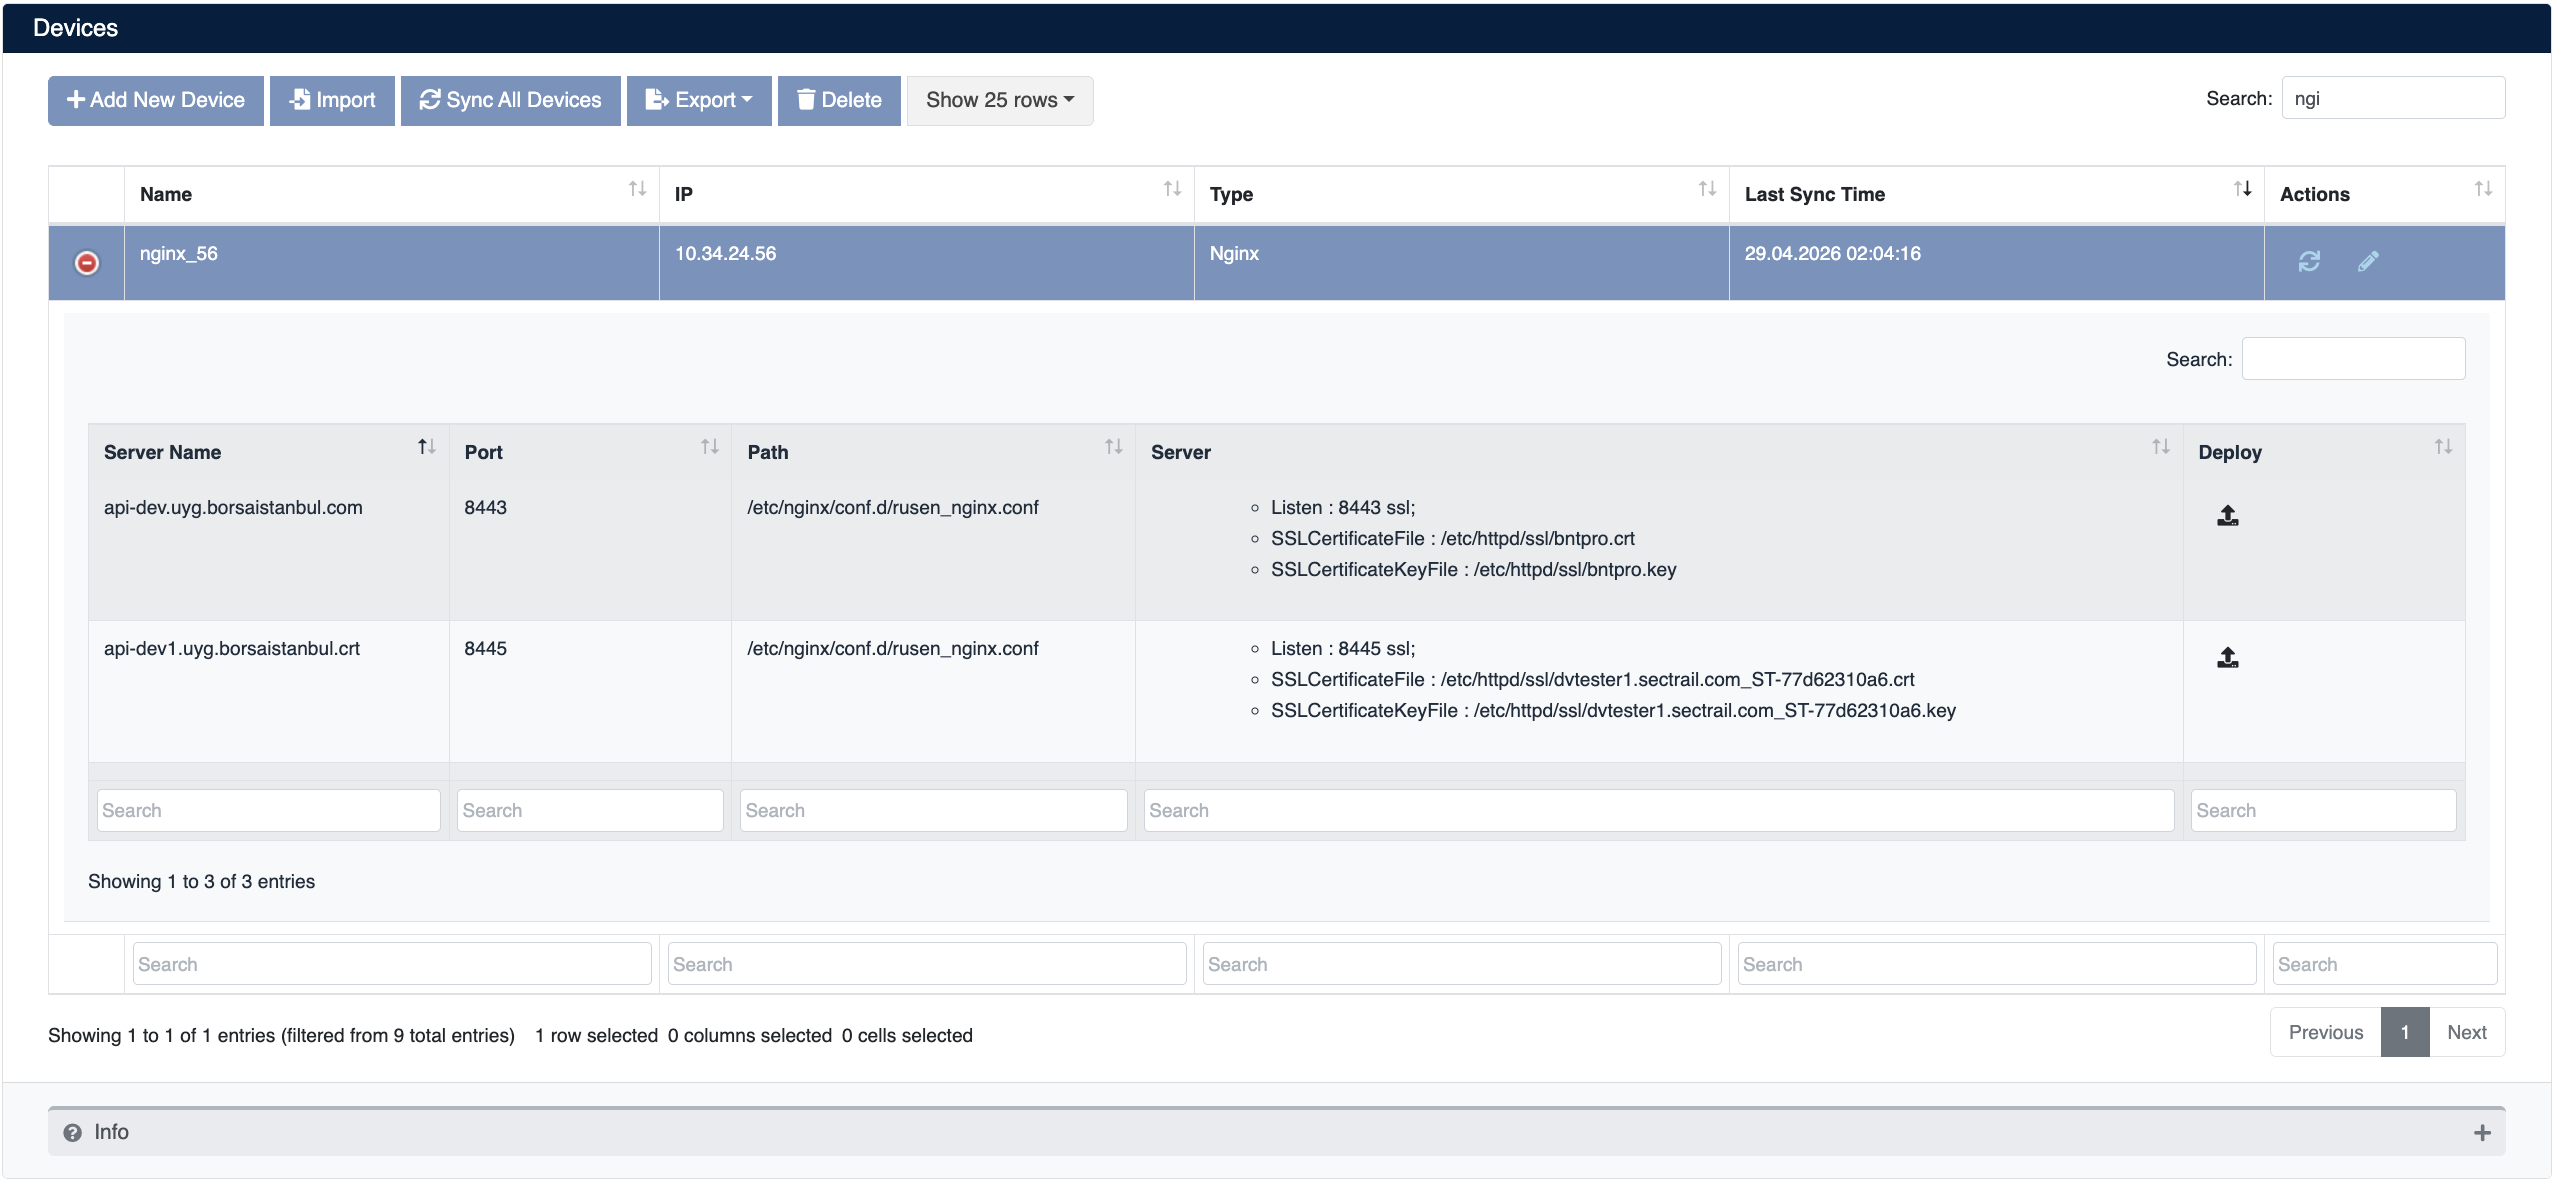
- Server Name: Server block server name (e.g.,
sectrailcm-test.borsaistanbul.com) - Port: Ports NGINX is listening on (e.g.,
8443) - Path: NGINX configuration file path (e.g.,
/etc/nginx/conf.d/domain_nginx.conf) - Server: SSL configuration details
- Deploy: For certificate deployment
Certificate Deployment
Step 1: Server Block and Certificate Selection
- Select your NGINX device from the Automation > Devices section
- In the device details, find the Server Block you want to deploy a certificate to
- Click the Deploy button on the relevant row
- In the Deploy Certificate window that opens:
- Virtual Servers: Target Server Block information is displayed (IP, port, server name)
- Certificate: Select the certificate you want to deploy from the dropdown menu
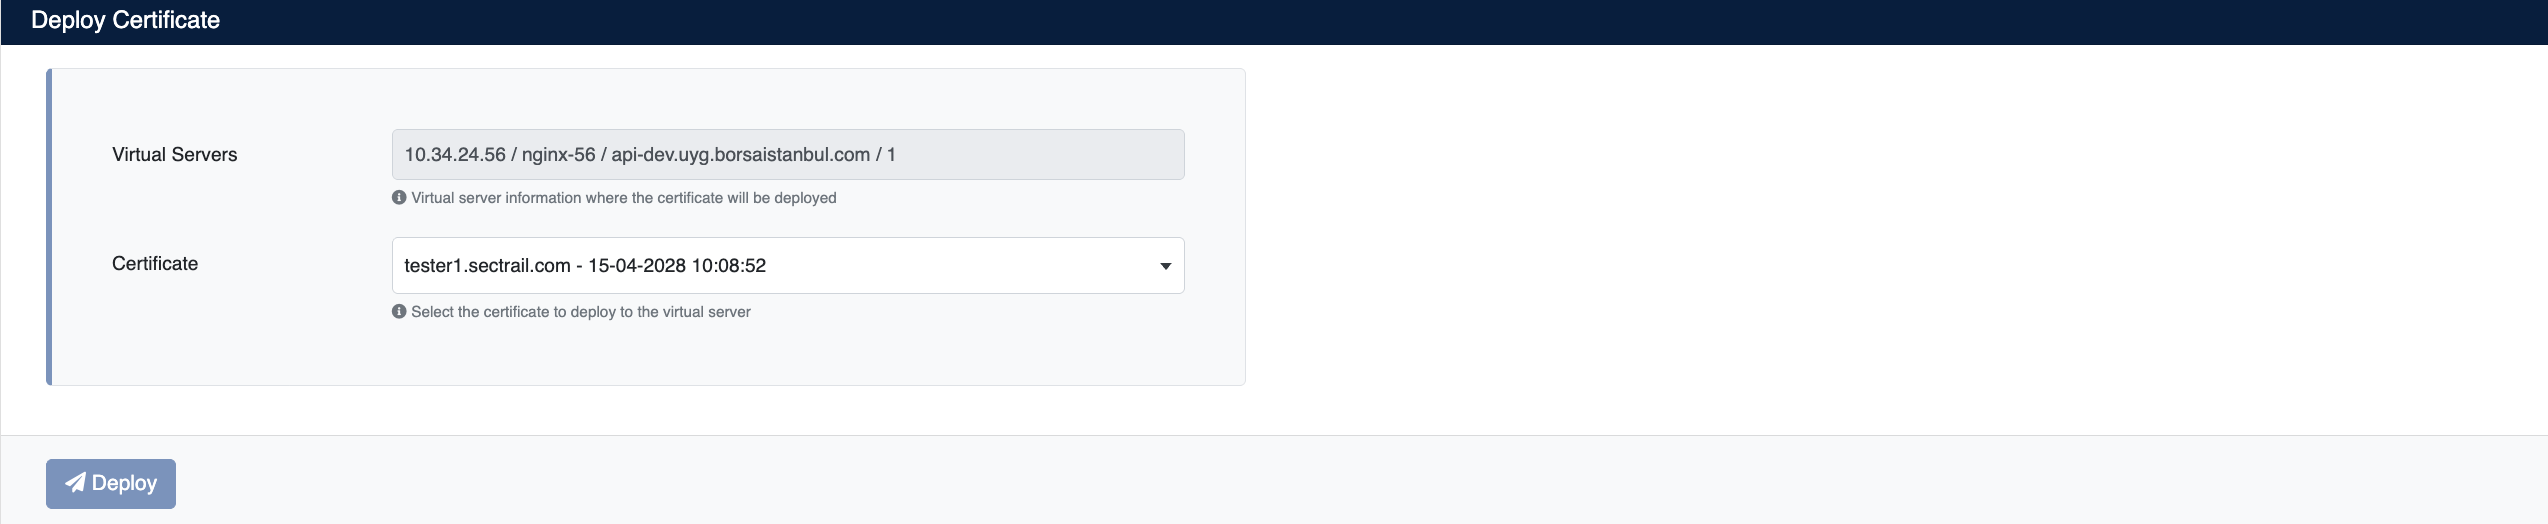
Step 2: Start Deployment Process
Click the Deploy button to start the certificate deployment process.
Step 3: Process Tracking
The deployment process can be tracked from the Automation > Processes section:
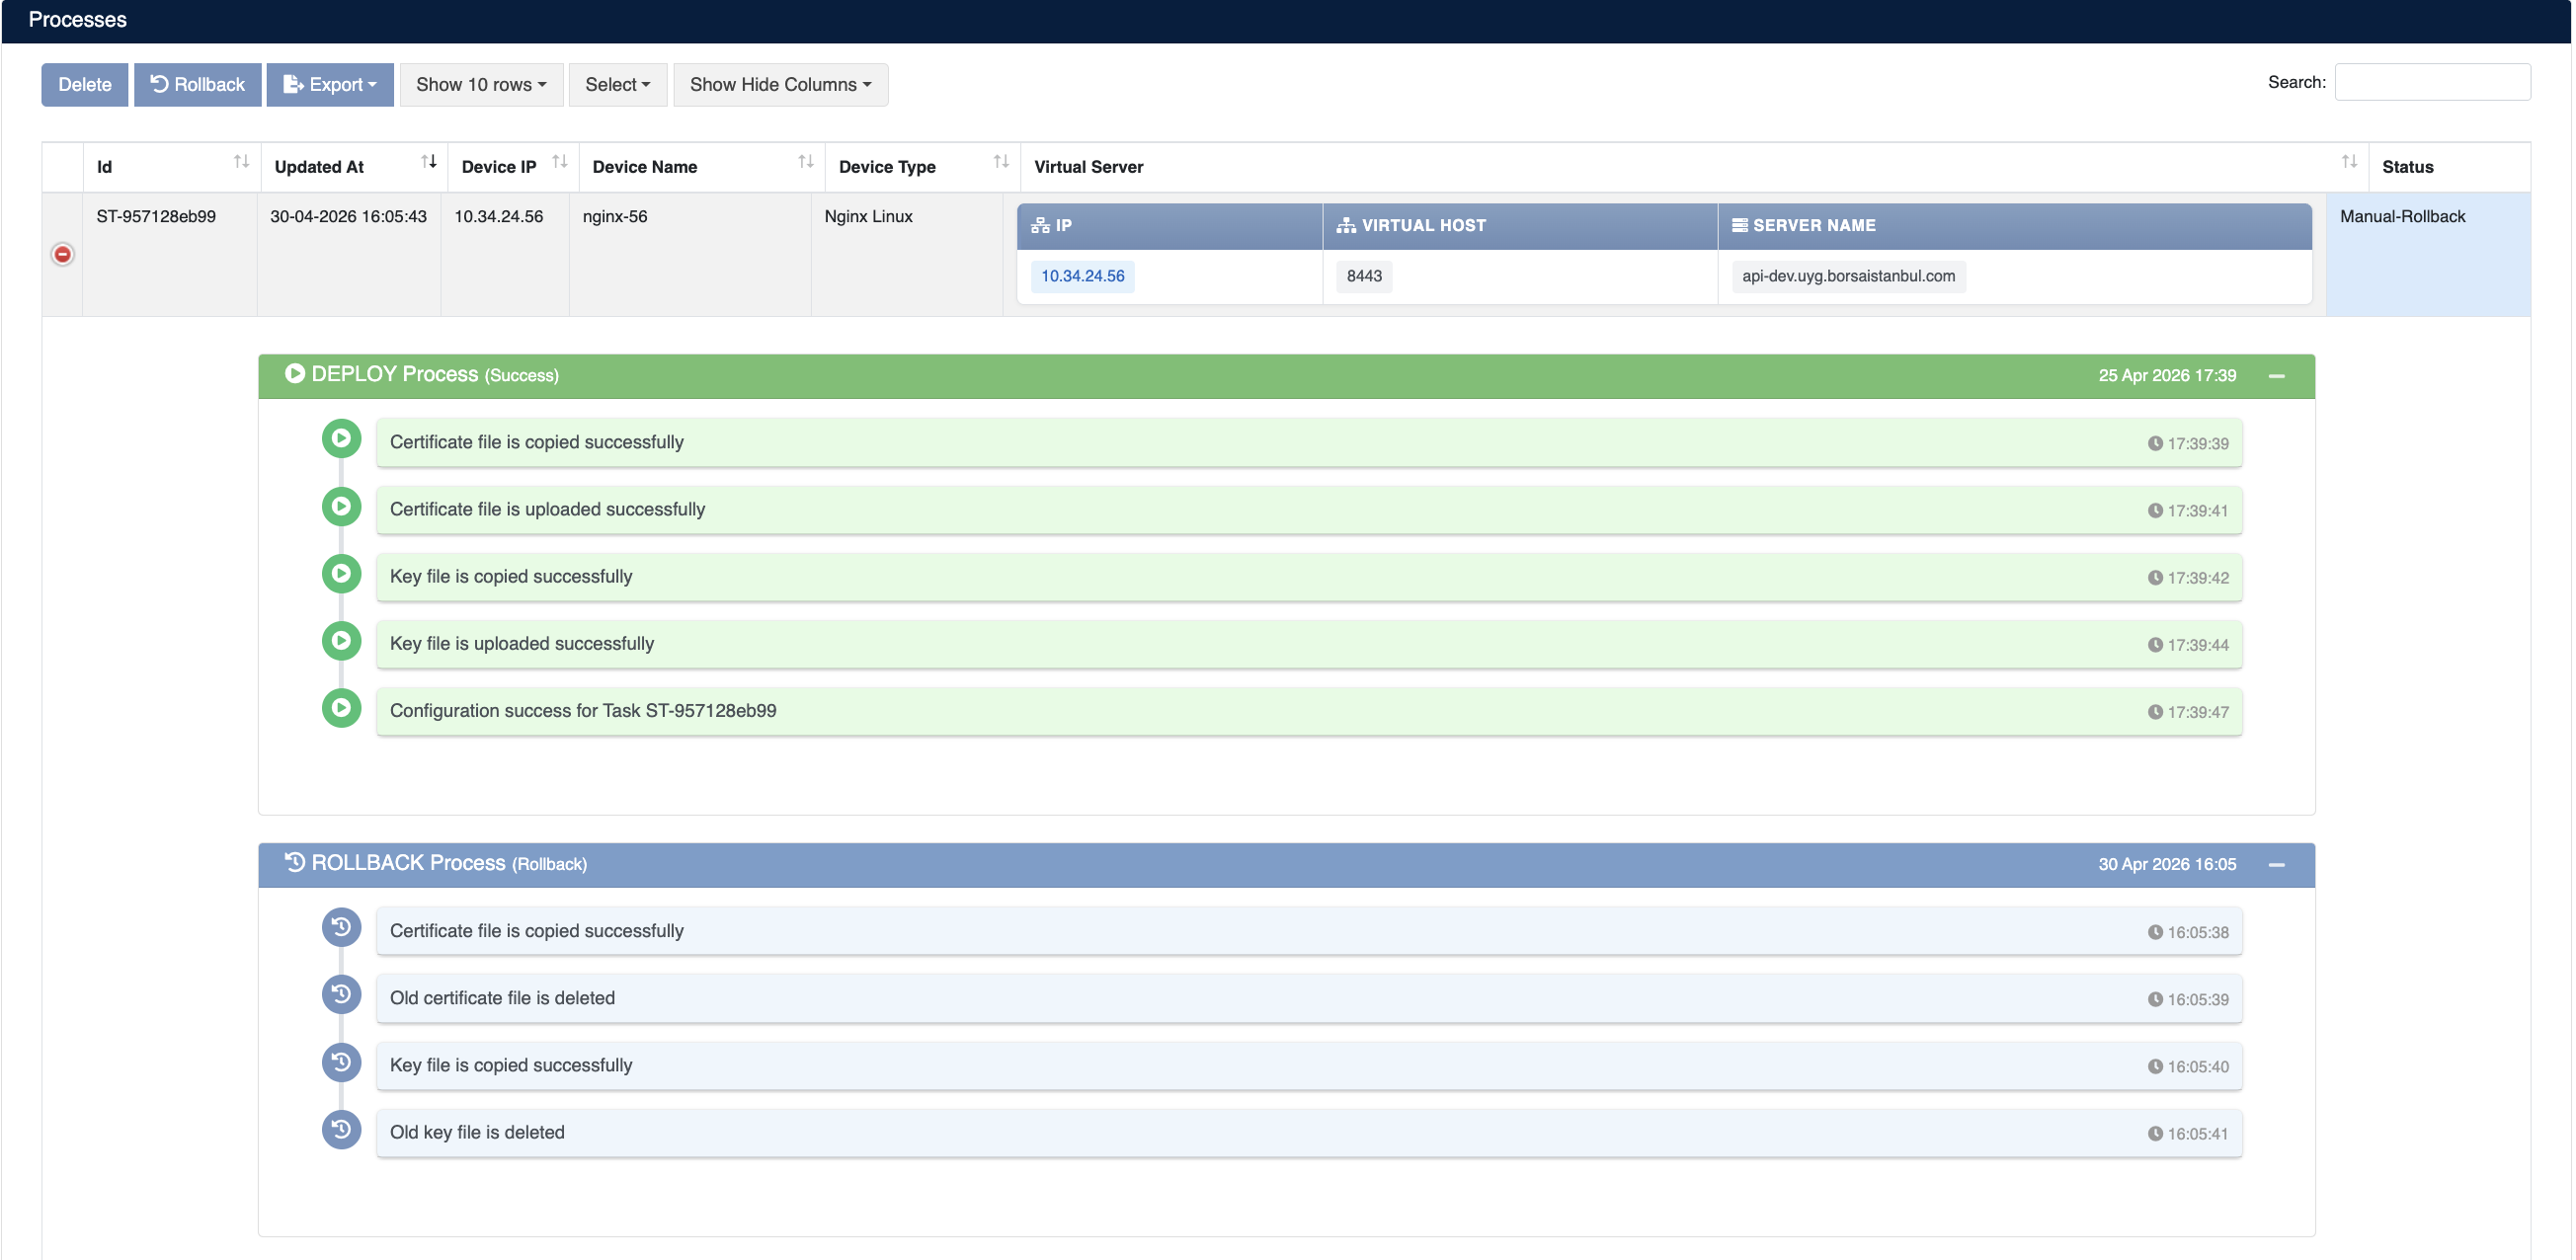
Process Details
The following steps are performed during deployment:
| Step | Process Description |
|---|---|
| 1 | Certificate, key, and chain files are uploaded to the server |
| 2 | Current certificate files are backed up |
| 3 | New certificate configuration is applied |
| 4 | NGINX service is reloaded |
Rollback Process
If problems occur after certificate deployment, the Manual Rollback feature can be used.
If an error occurs during any step of the deployment process, the system automatically performs the rollback operation and all changes are reverted.
Rollback Steps
- Navigate to Automation > Processes
- Find the process you want to roll back
- Use the Manual-Rollback option in the Status column
- Confirm
Operations During Rollback
| Step | Operation |
|---|---|
| 1 | New configuration is removed |
| 2 | Backed up certificate files are restored |
| 3 | Newly uploaded certificate, key, and chain files are deleted |
| 4 | NGINX service is reloaded |