🔖 Ownership Management
SecTrail Certificate Manager provides the ability to automatically assign ownership to certificates based on server or certificate attributes. This ensures alarms and notifications are directed to the right teams and individuals.
Overview
With the ownership management system, you can:
- Assign ownership based on server IP addresses or certificate attributes
- Automatically update discovery lists with ownership information
- Direct alarms to relevant teams
- Integrate with external inventory systems via API
- Define ownership rules using regex patterns
Ownership Components
Ownership Groups
Ownership Groups define the teams or individuals responsible for certificates. Each group consists of:
- Group Name: A unique identifier for the group
- Email Addresses: One or more email addresses to receive notifications
- Purpose: Whether the group is used as certificate owner (Owner), approver (Approver) or both
- Linked LDAP Groups: LDAP/AD groups whose members' email addresses are added to the group automatically
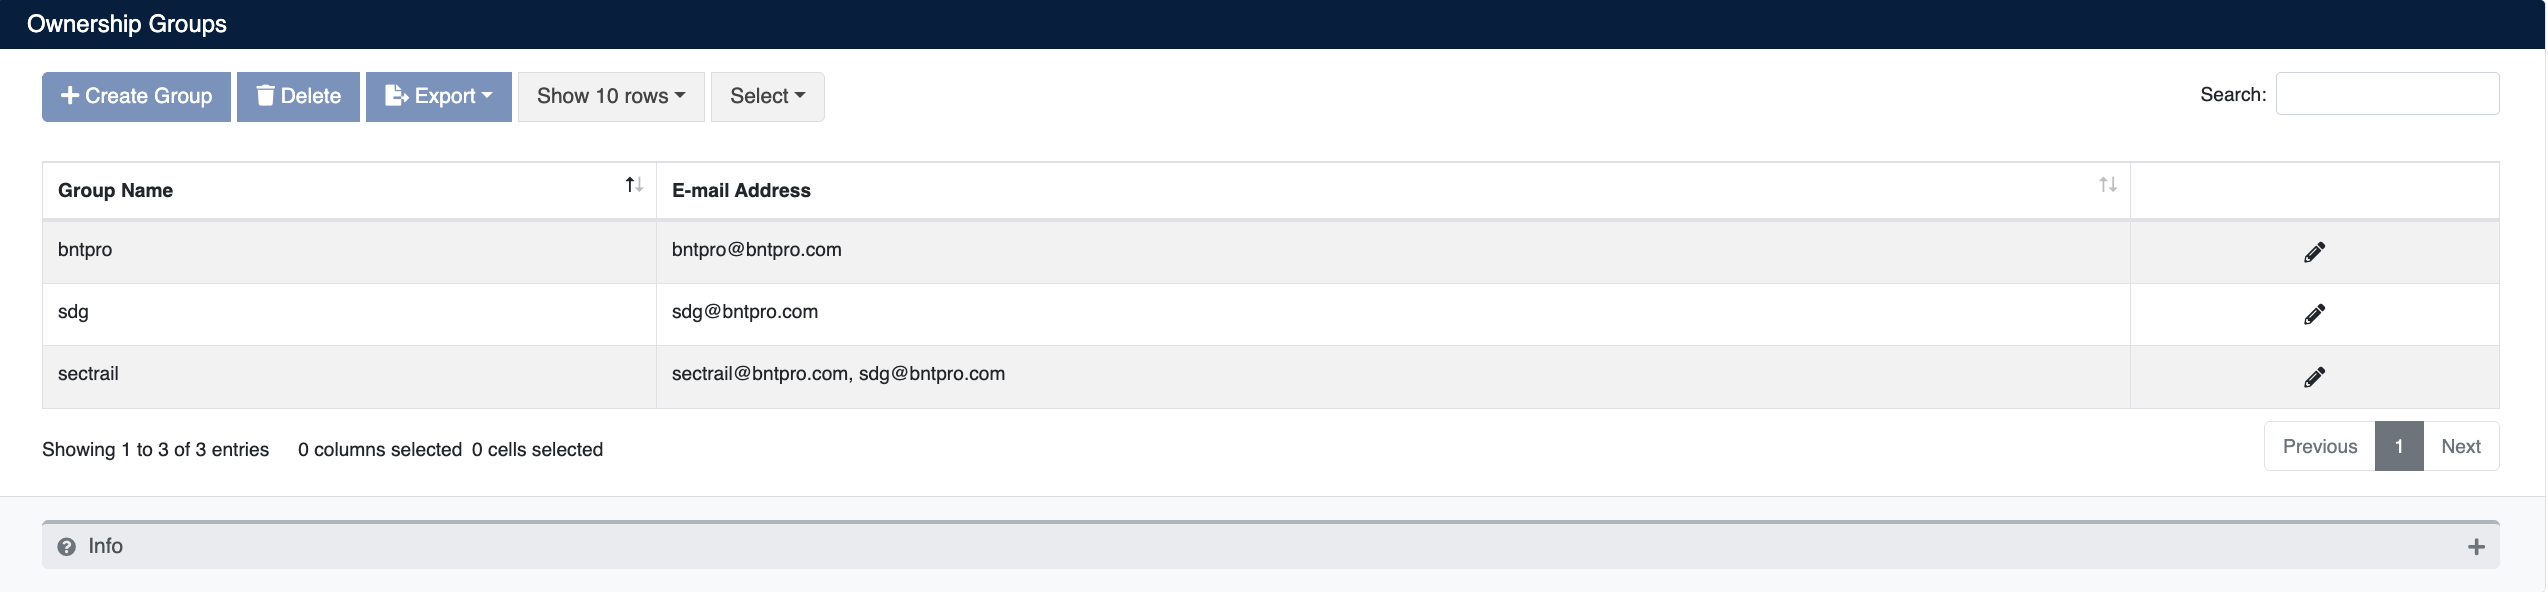
Creating an Ownership Group
- Go to the Ownership Groups section
- Click the Create Group button
- Enter the following information:
- Group Name (required): A unique name for the ownership group
- E-mail Address: Email addresses of the group. Multiple addresses can be added with the Add More button. This field is optional when at least one LDAP group is linked; otherwise at least one address must be entered.
- Purpose: What the group is used for. A group may serve both purposes.
- Owner: The group can be assigned as certificate owner. It is listed in the group selection of the Ownership Profiles screen; its email addresses are used as certificate owner emails and receive expiration alarms.
- Approver: The group can be selected as an approver or email recipient (see Screens Using Approver Groups).
- Linked LDAP groups: LDAP groups whose members are added to this group's email list. The list shows the Group type policies from the Remote Authentication Policy screen by their Policy Name (or DN if no name is set). Multiple groups can be selected.
- Click the Submit button to create the group
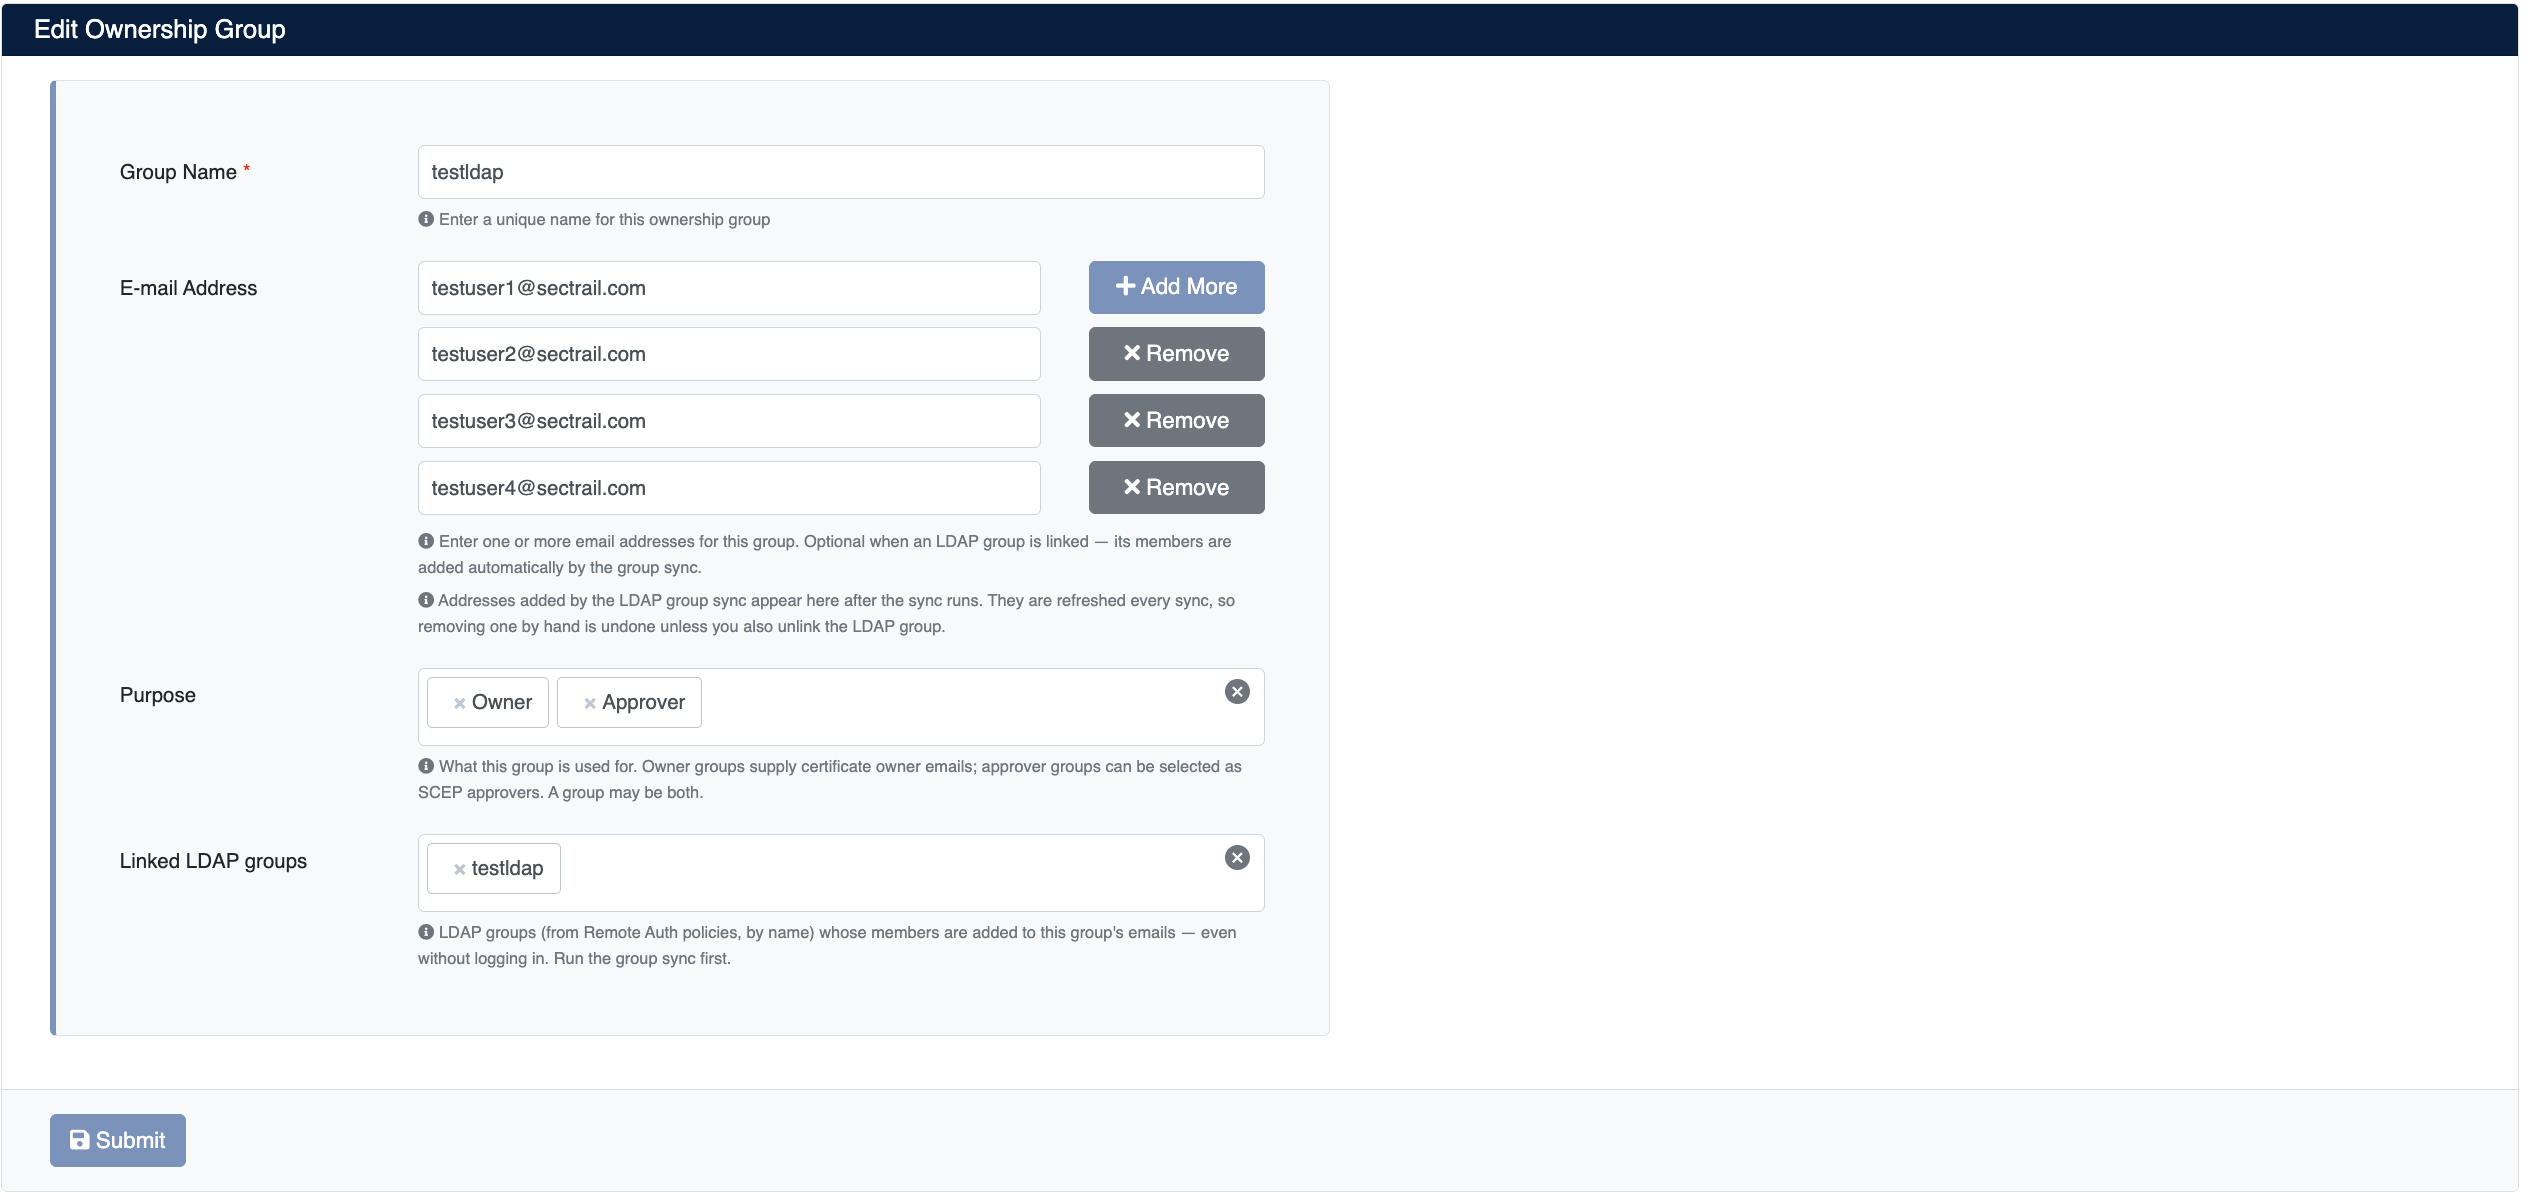
Linking LDAP Groups
Ownership groups can be linked to LDAP/AD group policies. The email addresses of the linked LDAP group's members are added to the ownership group's email list automatically by the LDAP group member sync. This way certificate owners and approvers can be managed through Active Directory group membership instead of entering email addresses one by one.
If the Linked LDAP groups list is empty, first create a Group type policy under Users → LDAP → Policy. After linking a group, run the sync with the Sync group members now button so the members appear in the email list.
How the email list is updated:
- Addresses from LDAP appear in the E-mail Address list after the sync runs and are refreshed on every sync.
- Manually entered addresses are not affected by the sync.
- The address of a member who leaves the group is removed on the next sync. If the same address was also entered manually, it stays in the list.
- Removing an LDAP-sourced address by hand is not permanent; it is added back on the next sync. To stop an address from coming in, remove the user from the group in the directory or unlink the LDAP group.
- When an email is sent, recipients are resolved from the group's current list each time (manual addresses + linked LDAP group members).
Screens Using Approver Groups
Groups with Approver selected in the Purpose field can be selected in the following fields:
| Screen | Field |
|---|---|
| SCEP Profile | Approver groups: Groups that approve enrollment requests from this profile |
| CMP Profile | Approver groups: Groups the approval request is sent to |
| Template | Renewal Approver Groups: Groups the renewal approval email is sent to |
| Workflow | Renewal Approver Groups, Deployment Approver Groups: Groups the renewal and deployment approval emails are sent to |
| Workflow | Notification Groups, Recipient Groups: Groups the notification and certificate delivery emails are sent to |
Groups with an empty Purpose field (for example, created in earlier versions) remain listed on the Ownership Profiles screen for backward compatibility. To appear in approver lists, however, the Approver purpose must be selected explicitly.
Ownership Profiles
Ownership Profiles define rules that determine which certificates or servers belong to which ownership group. You can create profiles based on the following criteria:
- Network-based discovery (IP addresses)
- Certificate attributes (subject, issuer, SAN, etc.)
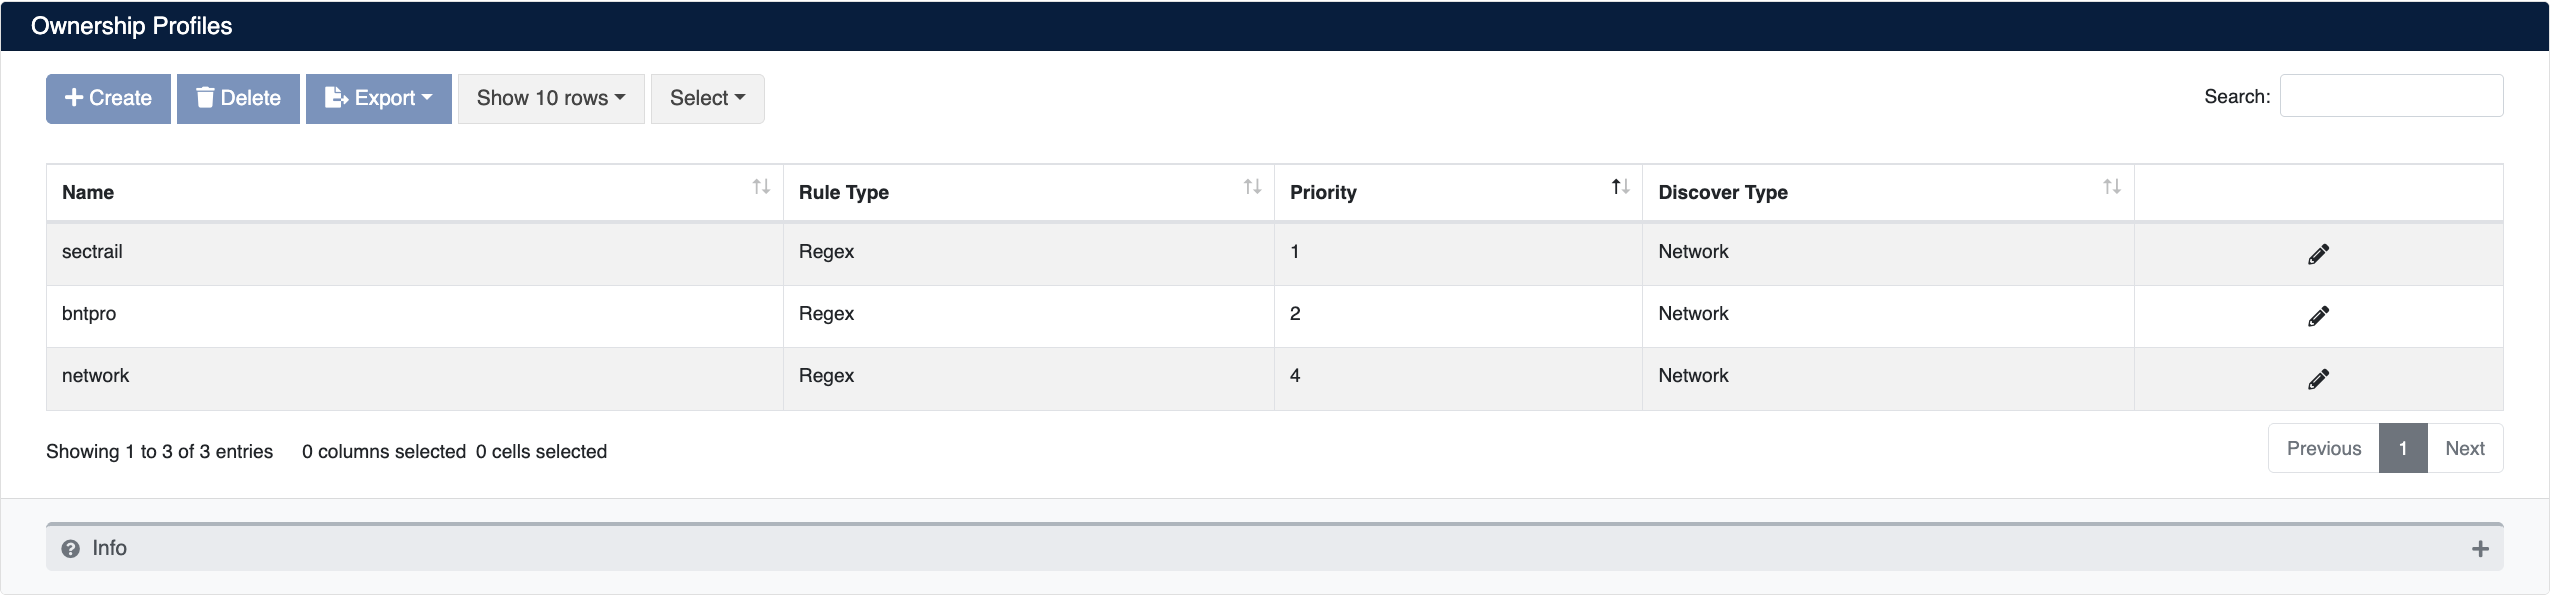
Creating an Ownership Profile
-
Go to the Ownership Profiles section
-
Click the Create button
-
Configure the following fields:
Basic Information:
- Name: A descriptive name for the profile
- Discover Type: Select either Network or DataPower
- Rule Type: Select the matching method (Regex, Service)
- Type: Select the attribute to match (Subject, IP Address)
- Condition: Select the matching condition (contains, equals)
- Regex: Enter the regex pattern to match. You can add multiple patterns with "Add More"
- Example for certificates:
CN=example.com.tr,OU=Security... - Example for IP addresses:
192.168.1..*
- Example for certificates:
Group Assignment:
- Ownership Groups: Select the ownership group to assign when the rule matches
Use Certificate Email:
- Utilize the email address found in the certificate:
- Enable: Use email addresses found in the certificate
- Disable: Use only ownership group emails
Priority:
- Specify the priority level for this rule (1 = highest priority)
- When multiple rules match, the rule with the highest priority is applied
-
Click the Submit button to create the profile
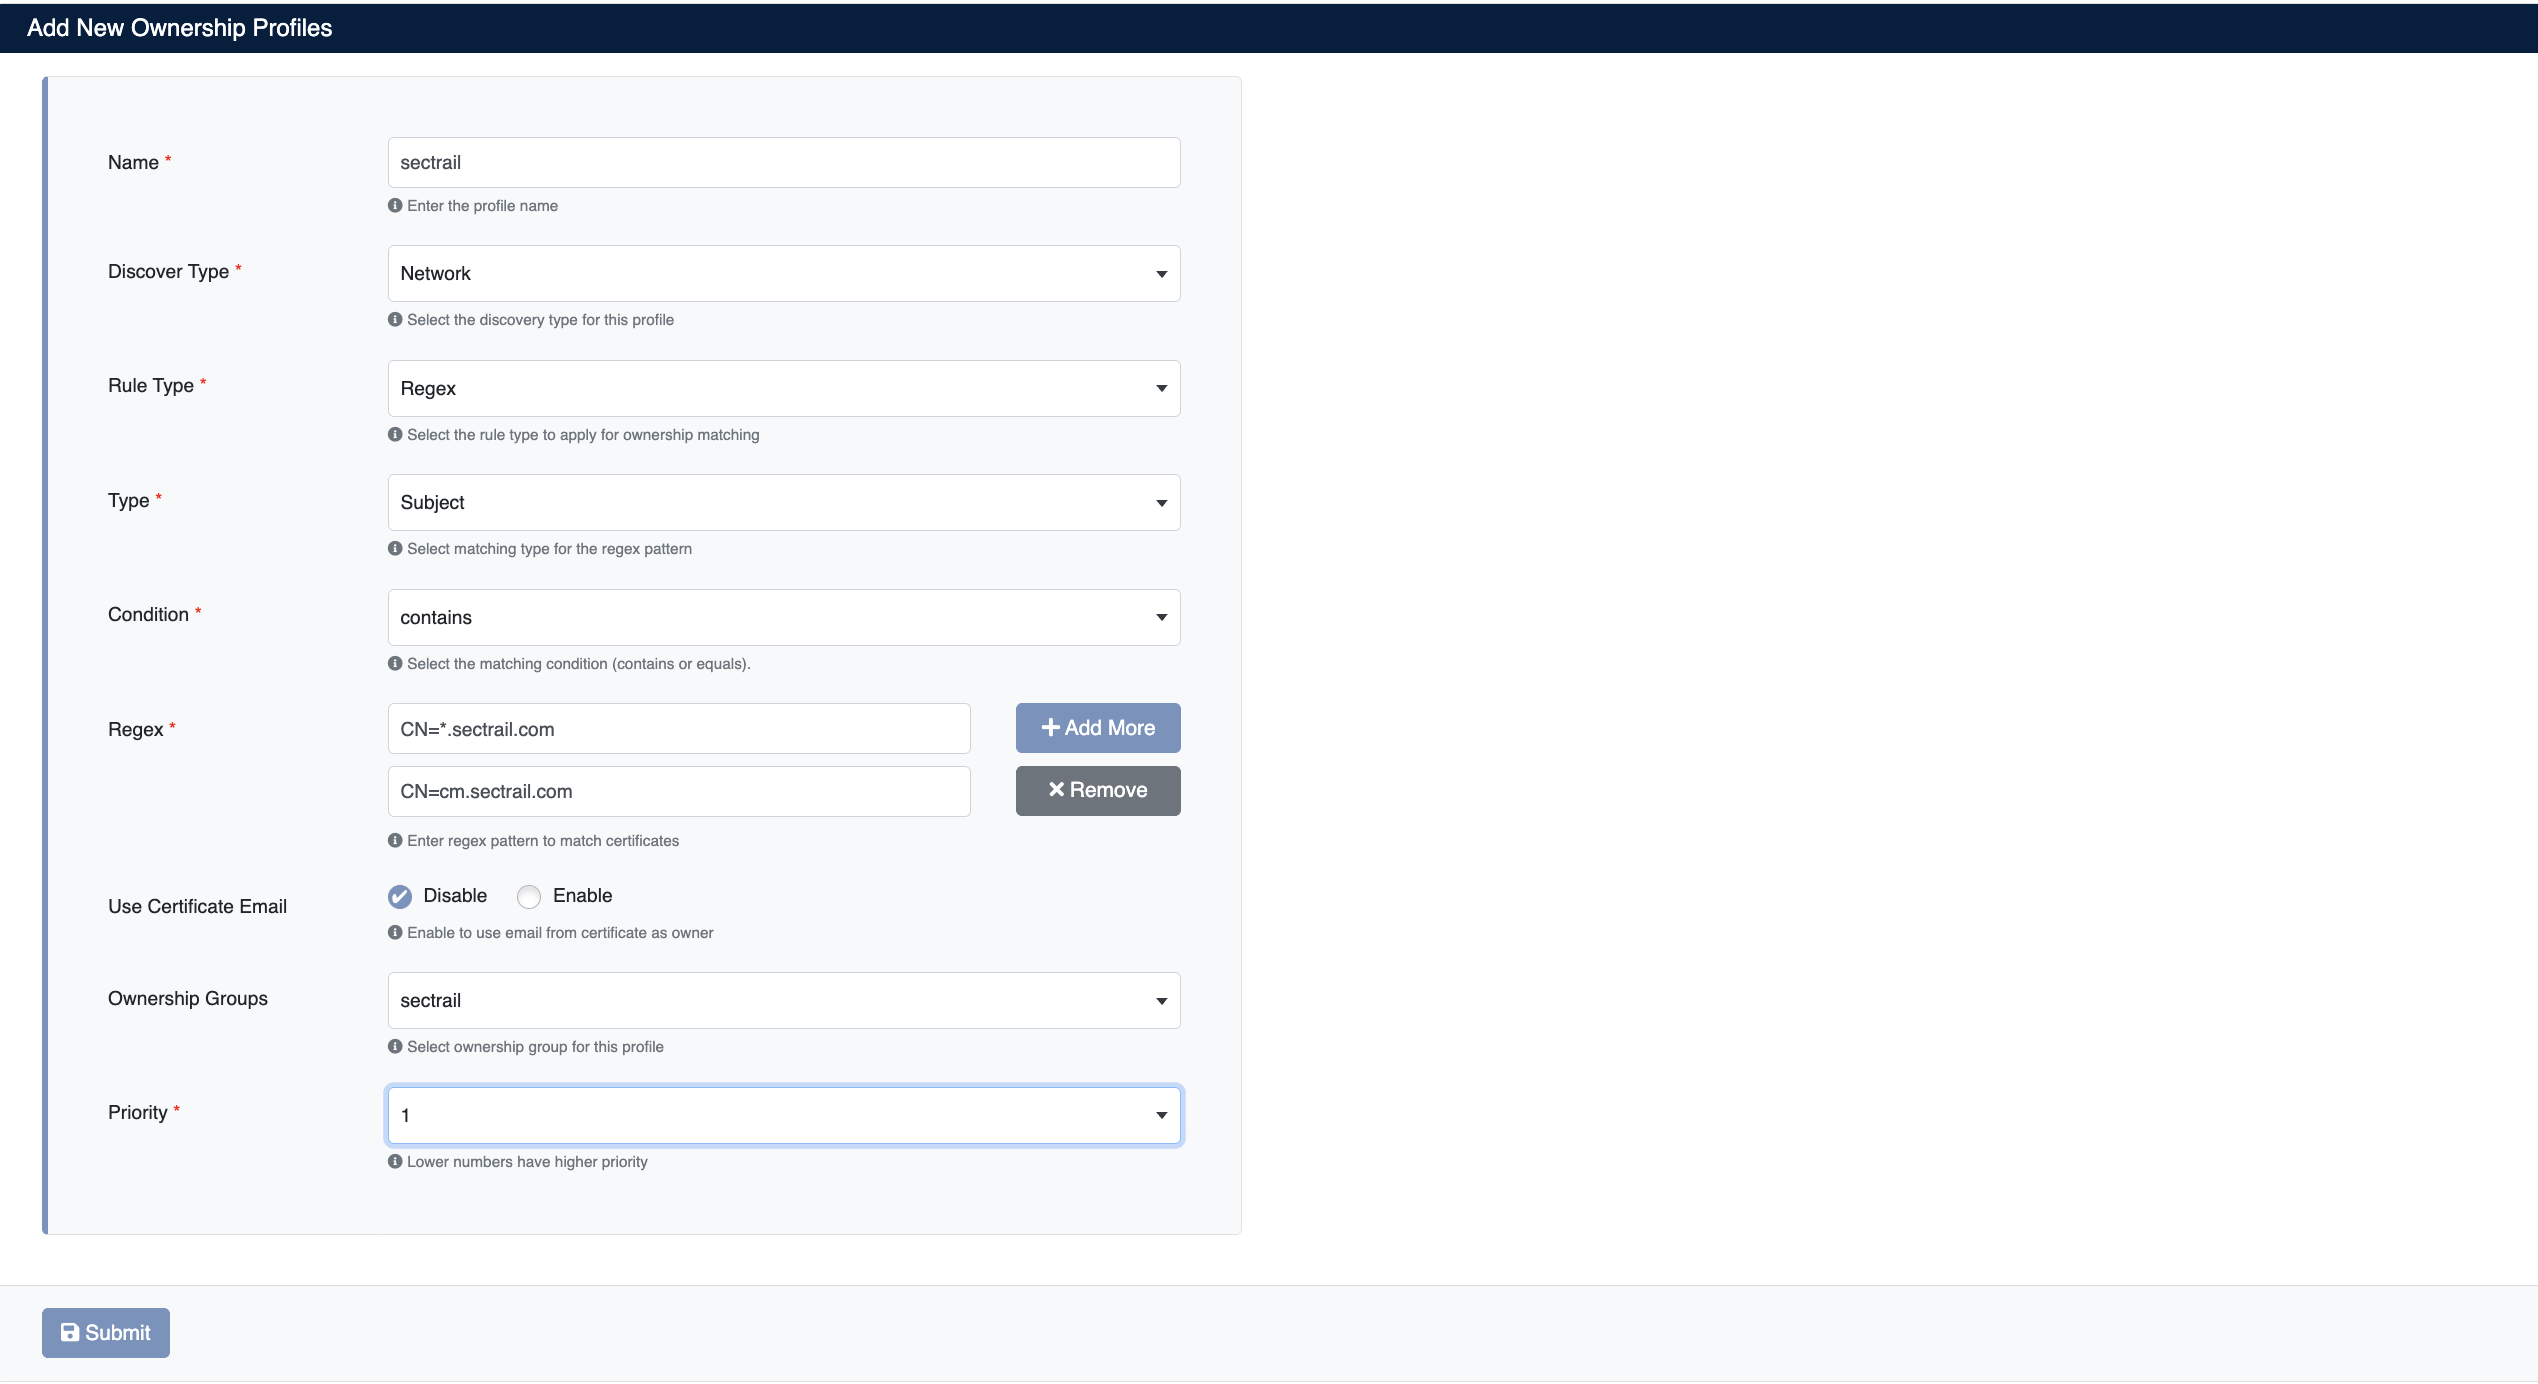
Ownership Service Profiles
If your organization has its own inventory system and stores ownership information in that system, you can integrate SecTrail CM with your own API. With this integration:
- SecTrail CM calls the API you provide to automatically query ownership information for discovered certificates
- Your technical team prepares an API endpoint in your own inventory system
- Ownership information is synchronized with SecTrail CM via the API
- No manual ownership assignment is required

Creating an Ownership Service Profile
- Go to the Ownership Service Profiles section
- Click the Create button
- Enter the following integration information:
- Name: A descriptive name for the service profile (e.g., "CMDB API", "Inventory System")
- URL: Your inventory system's API endpoint address (e.g.,
https://cmdb.yourcompany.com/api/ownership) - Username: API authentication username (credential information)
- Password: API authentication password (credential information)
- Click the Submit button to create the service profile
You need to contact your technical team to prepare an API endpoint in your own inventory system that SecTrail CM can query. The API should receive certificate information and return the relevant ownership group.
Discovery Settings
To reflect ownership information onto certificates in the inventory, discovery scheduling must be configured from the Ownership → Discovery Settings section. This way, SecTrail CM automatically matches ownership profiles with certificates at the defined interval and keeps the inventory up to date.

- Type: Specifies the discovery type (e.g.,
Network) - Working Period: The period during which ownership matching will run (e.g.,
Every week on Friday at 12:00)